
Report Example - Invoice
We have prepared for you an example of invoice creation in Tabidoo. Follow the steps to create a report easily on your own.
We have prepared for you an example of invoice creation in Tabidoo. Follow the steps to create a report easily on your own.
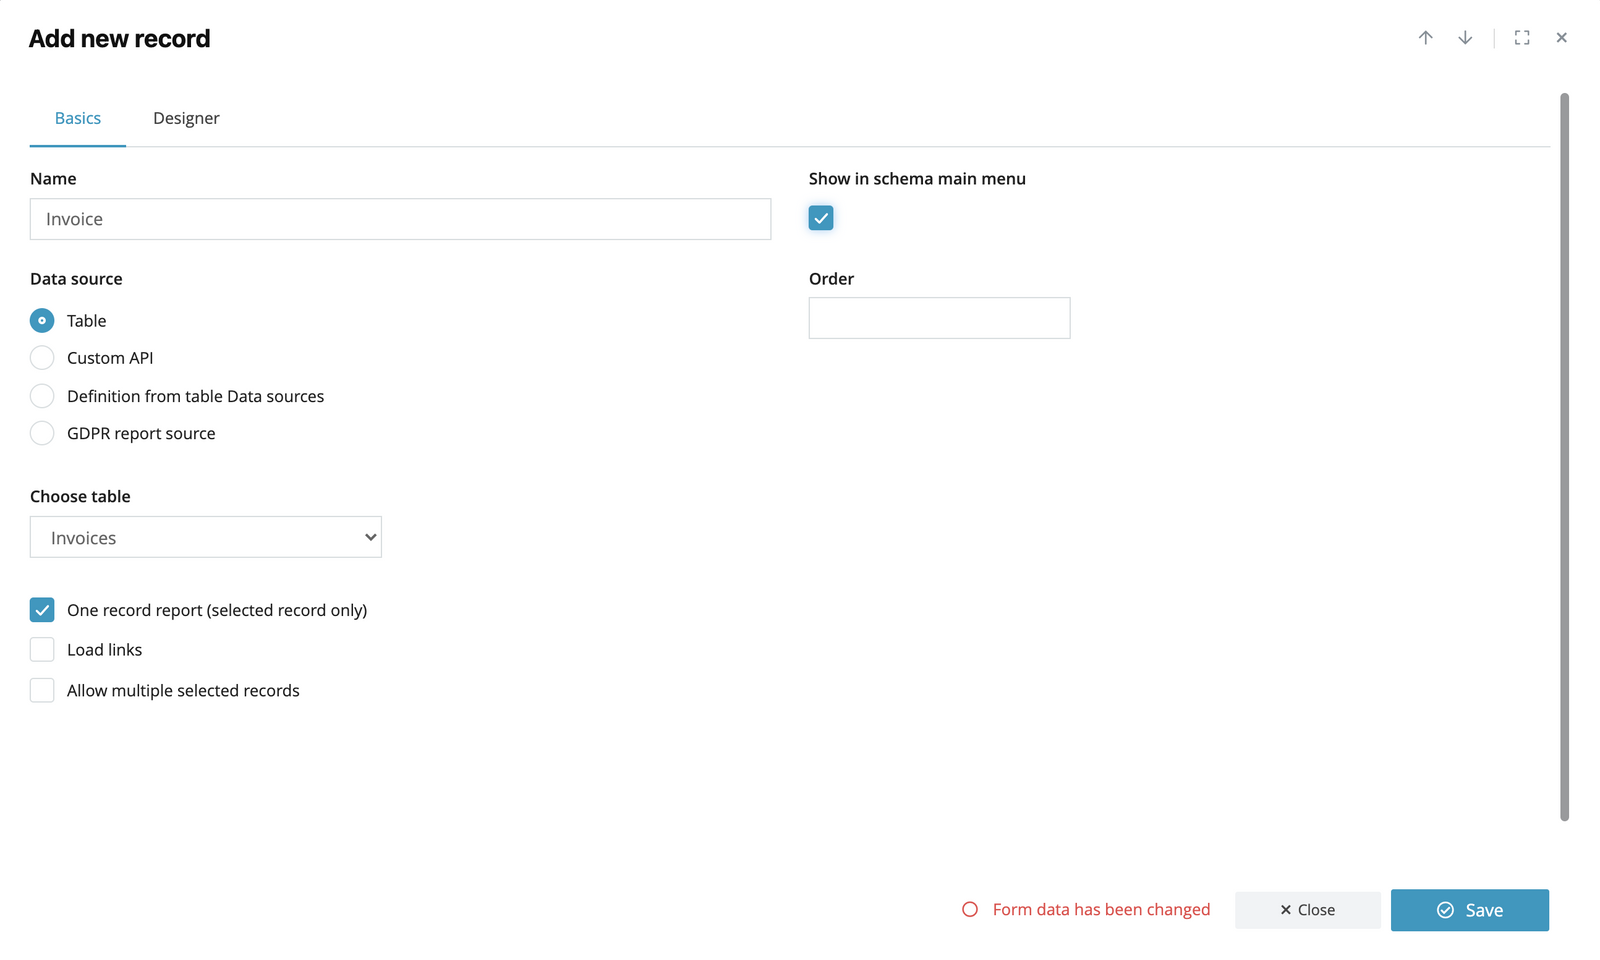
Basics tab
Start with our simple steps HERE.
For our example we used the following settings:
Report Designer
Add Report Title
This band is used to output the report title. It is output at the beginning of a report.
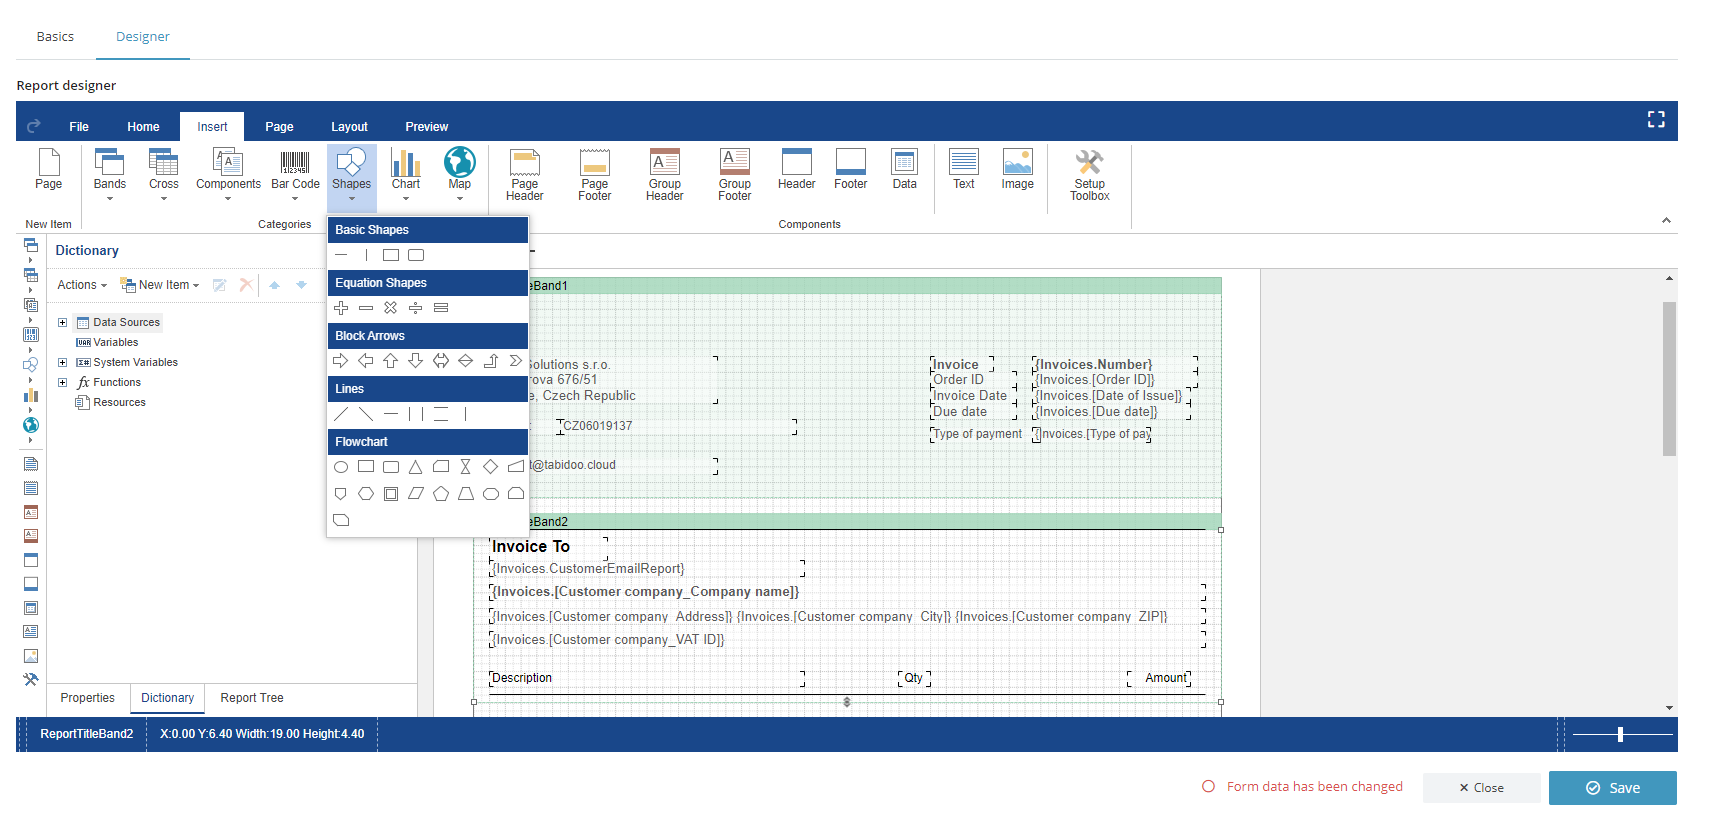
- Open the Insert tab
- Click on the left bar and select the first item "Report Title"
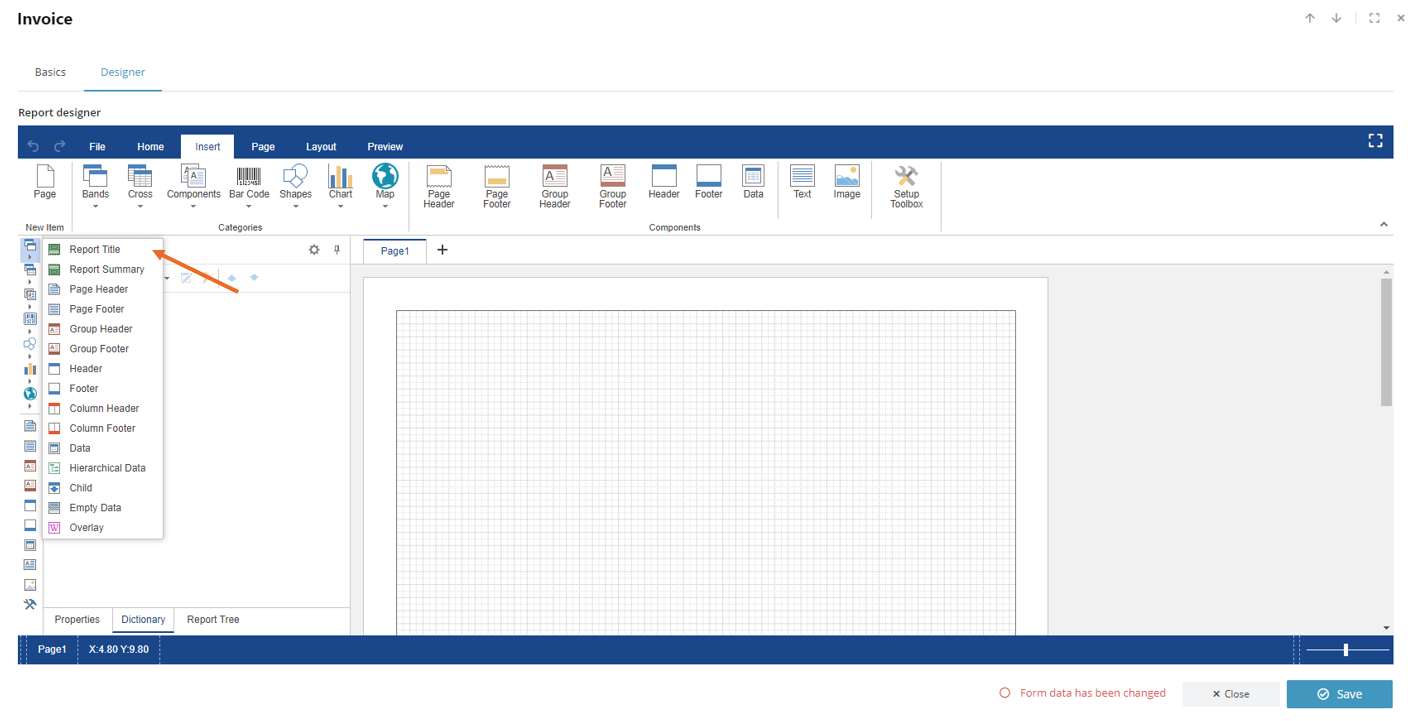
- Drag the Report Title on the page
Add elements to the Report Title

- Click on the dictionary tab in the bottom left corner
- Select the Data Sources, continue to Data, and then choose the appropriate fields that you want in your invoice (For example: Invoice number, Order ID, Due date...)
- Drag the labels on the report title band
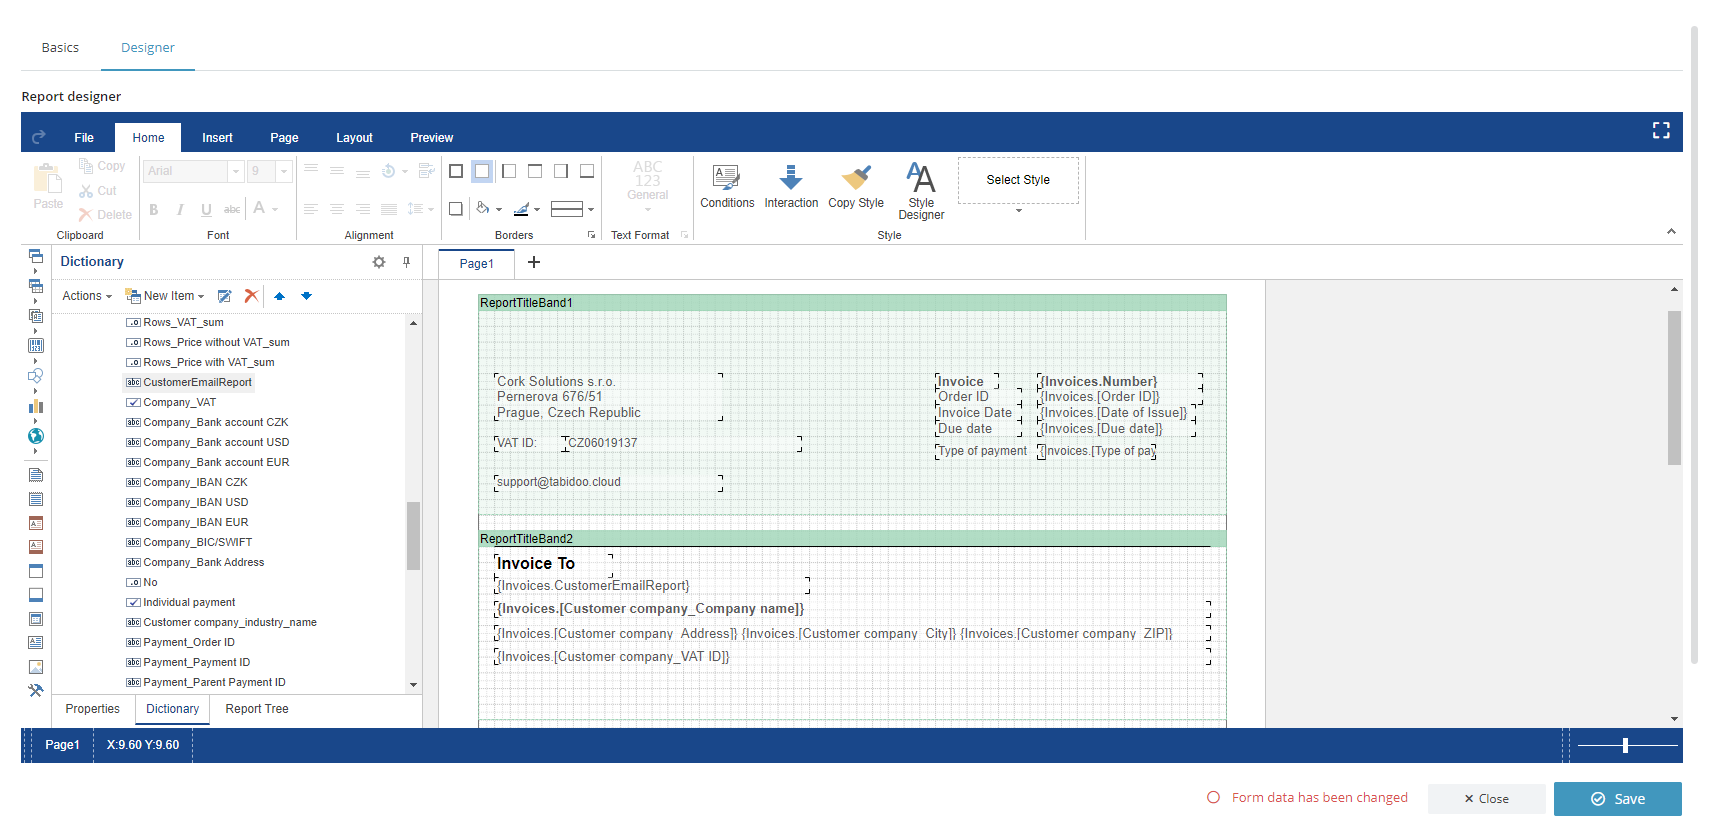
Add text fields to the Report Title
- To insert a text field, you can just simply click and enter any text you want (For example your company name, address, VAT ID...)
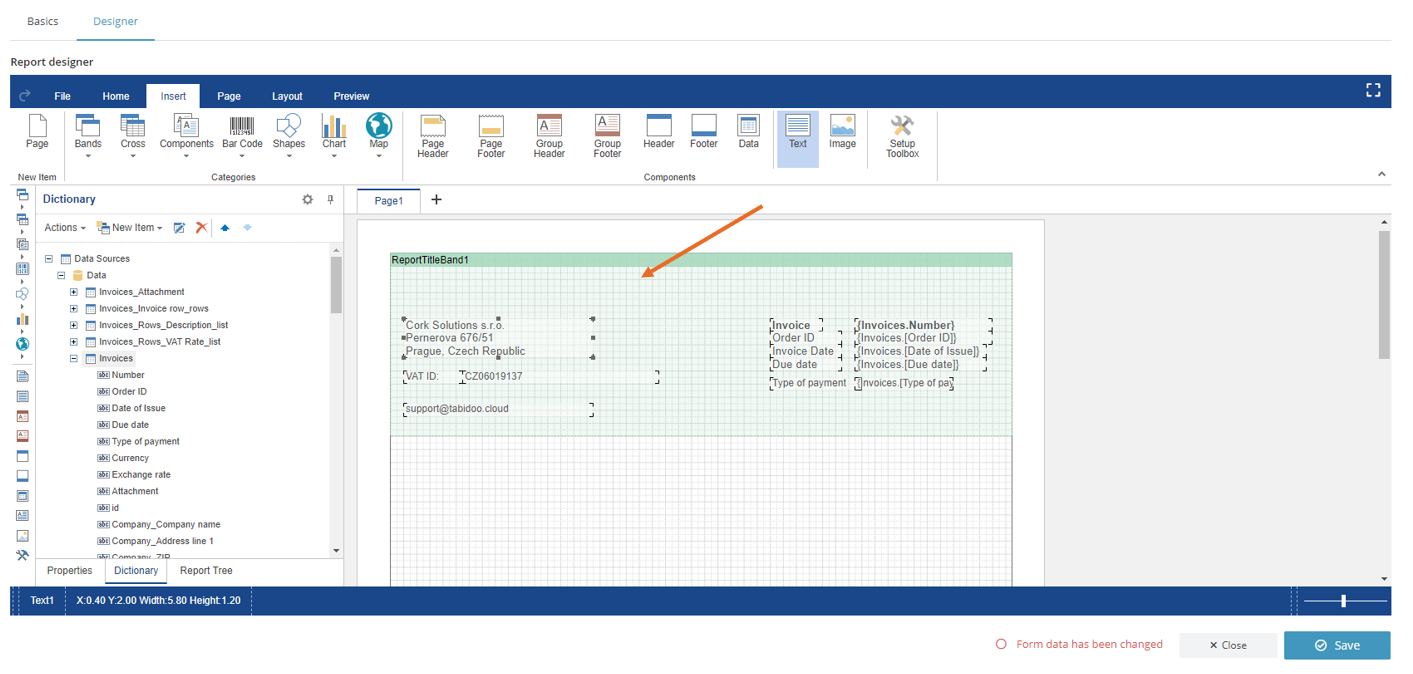
- Repeat the same process for the customer's details
- You can be more creative and use objects to make your invoice even prettier :)
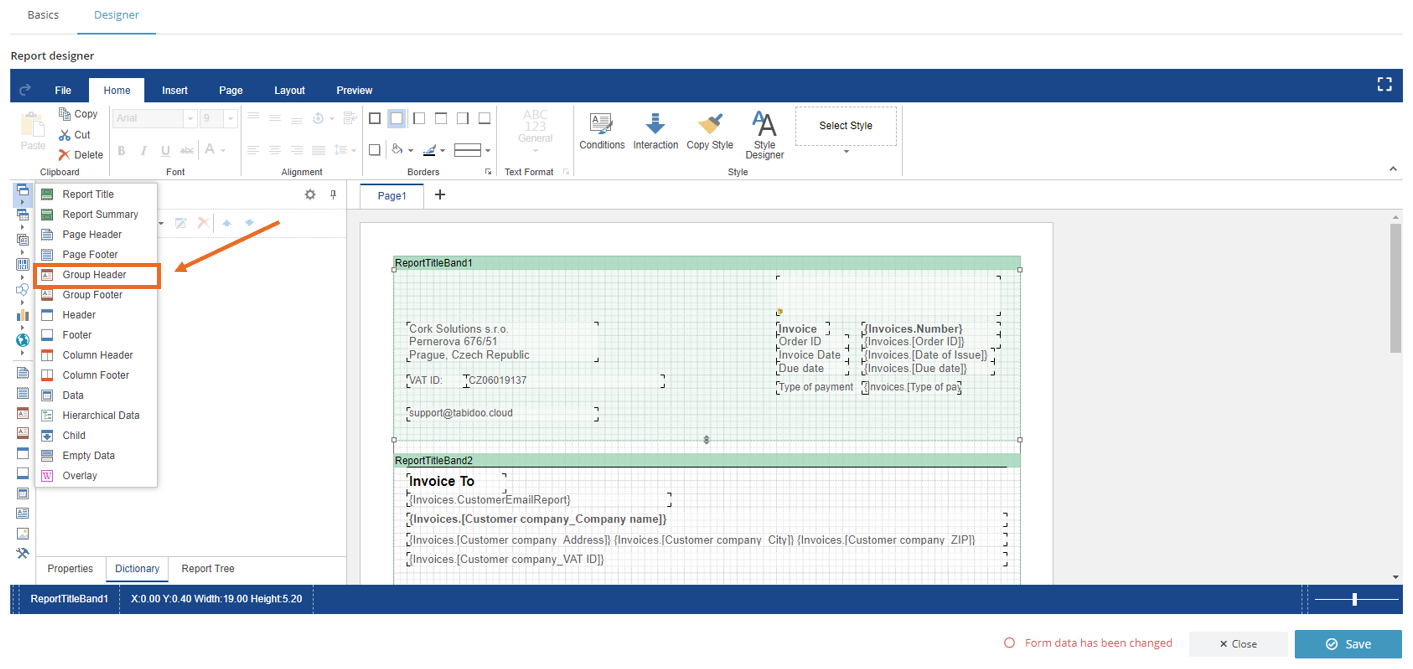
Create the group header
- Use the same bar as for the report title shown above and drag the "Group Header" band on the page below the report title band.
This band is the basic band for rendering reports with grouping. The components for showing information by this group are placed on the group header.
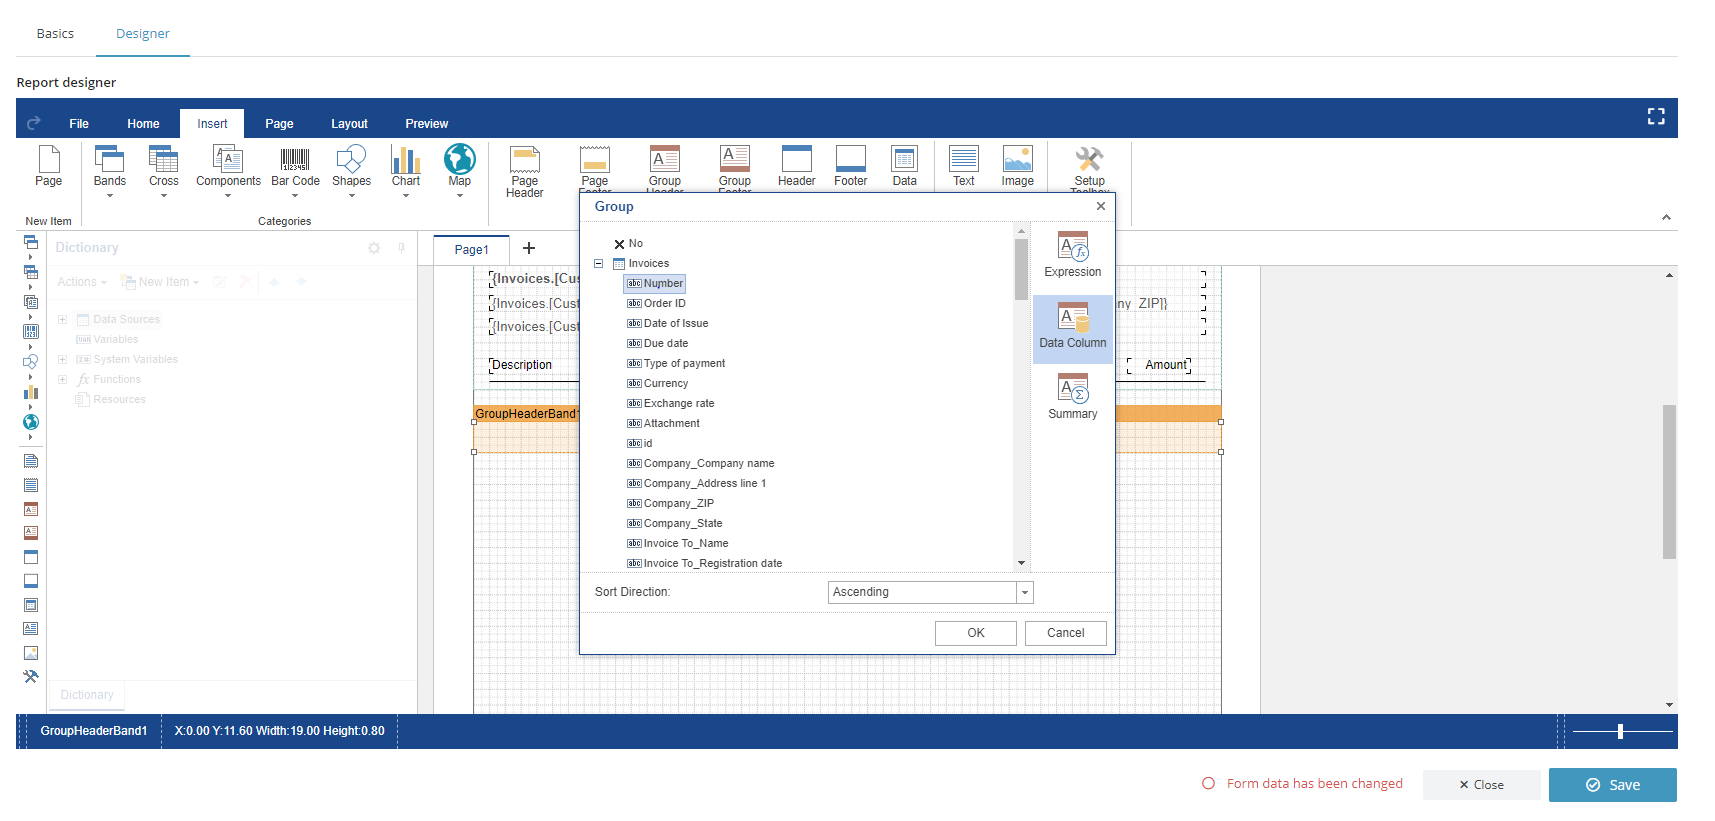
- You will see a new window with 3 tabs
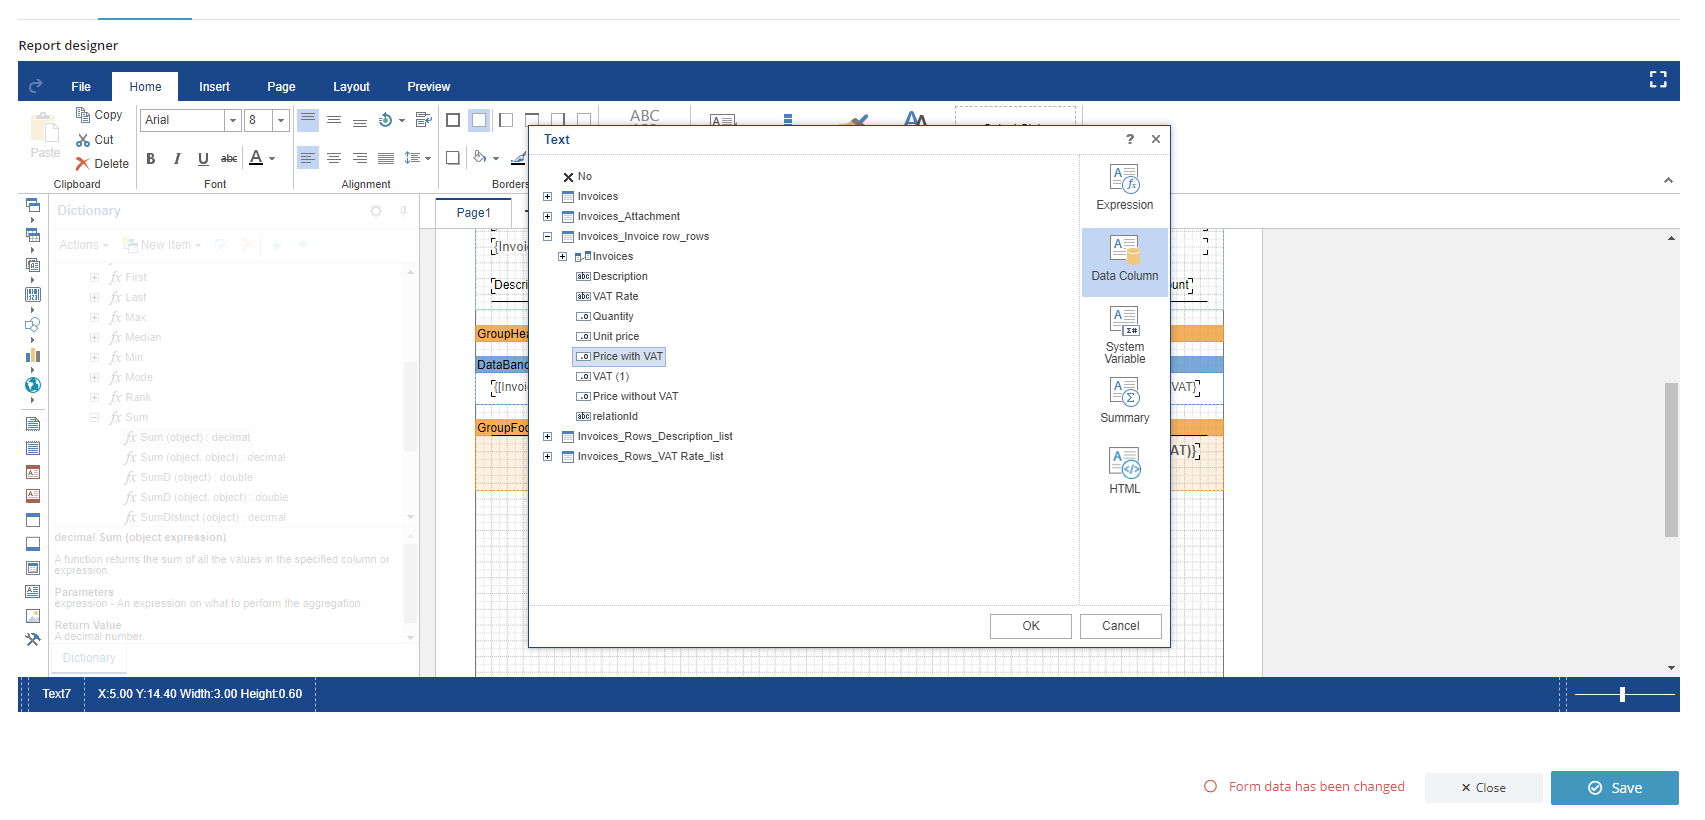
- Select Data Column, click on the table field that you want to have the data grouped by (For example in our case: the invoice number)
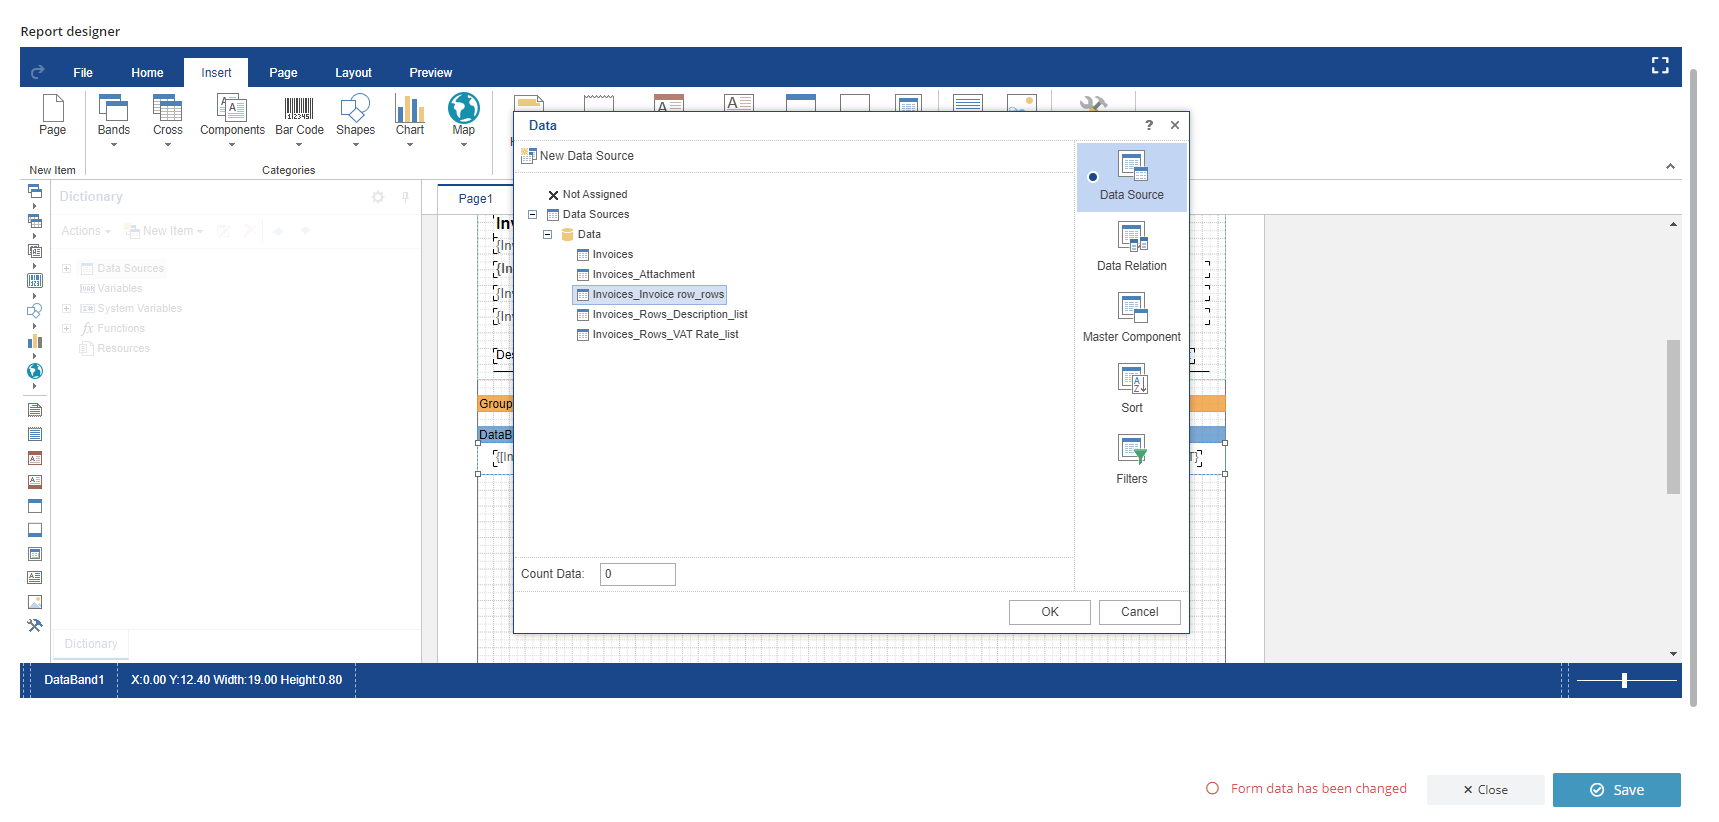
Insert Data from the left tab
- Select the rows for the invoice - add the elements you want to be shown in the invoice (For example: Price, Description...)
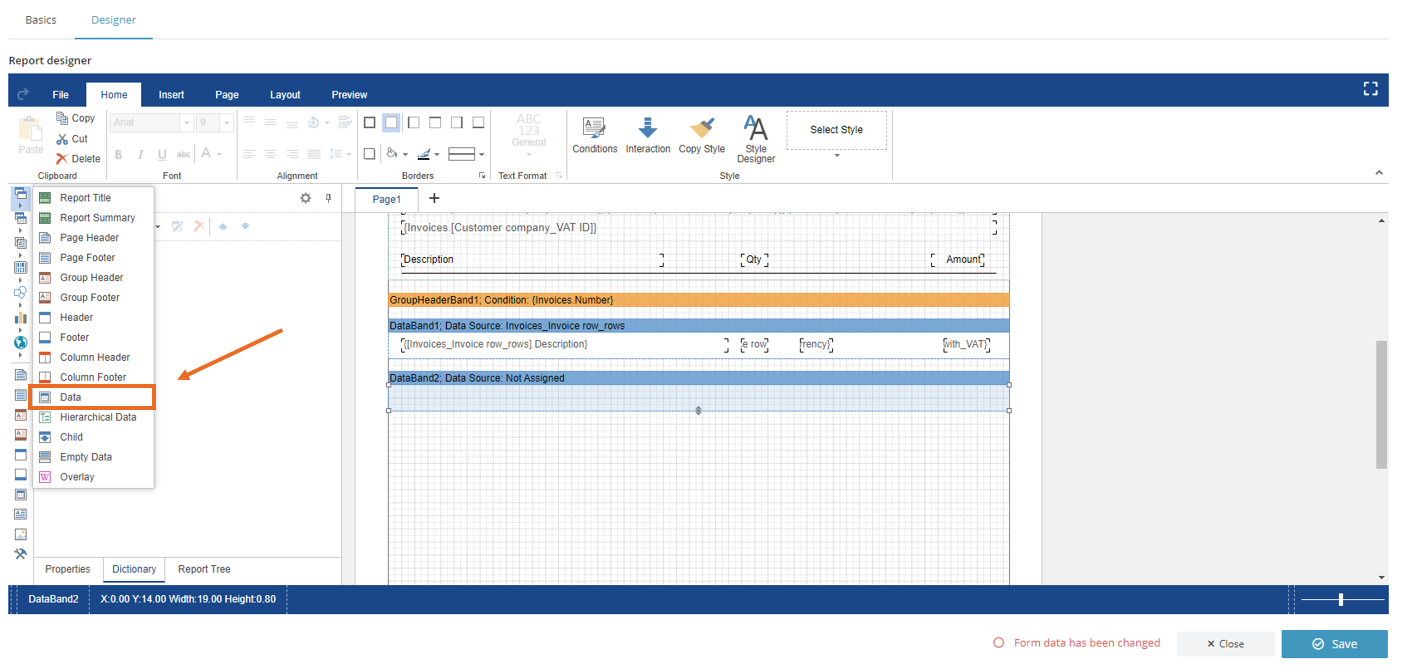
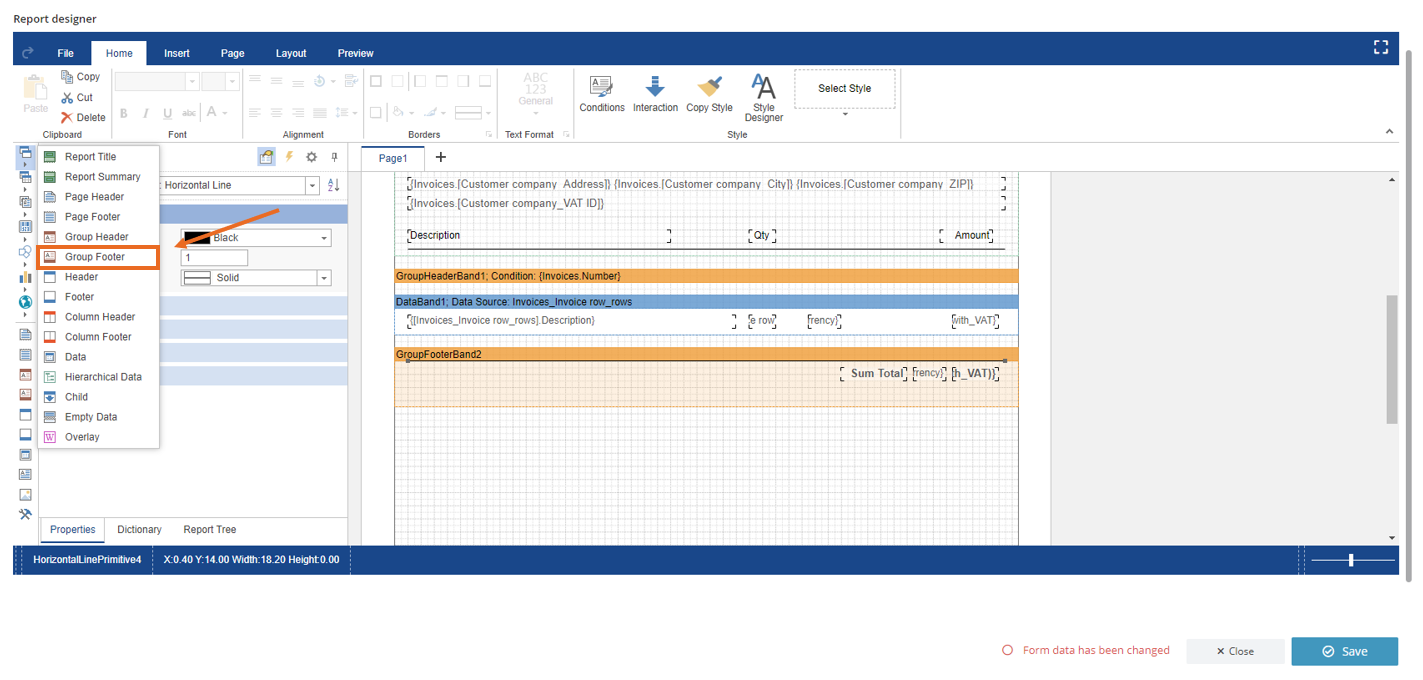
Insert the Group Footer
This band is placed after the Data band. And this is the Data band with what the Group Header band is bound. Each Group Footer band belongs to the specific Group Header band. The Group Footer band will not be output without the Group Header band.
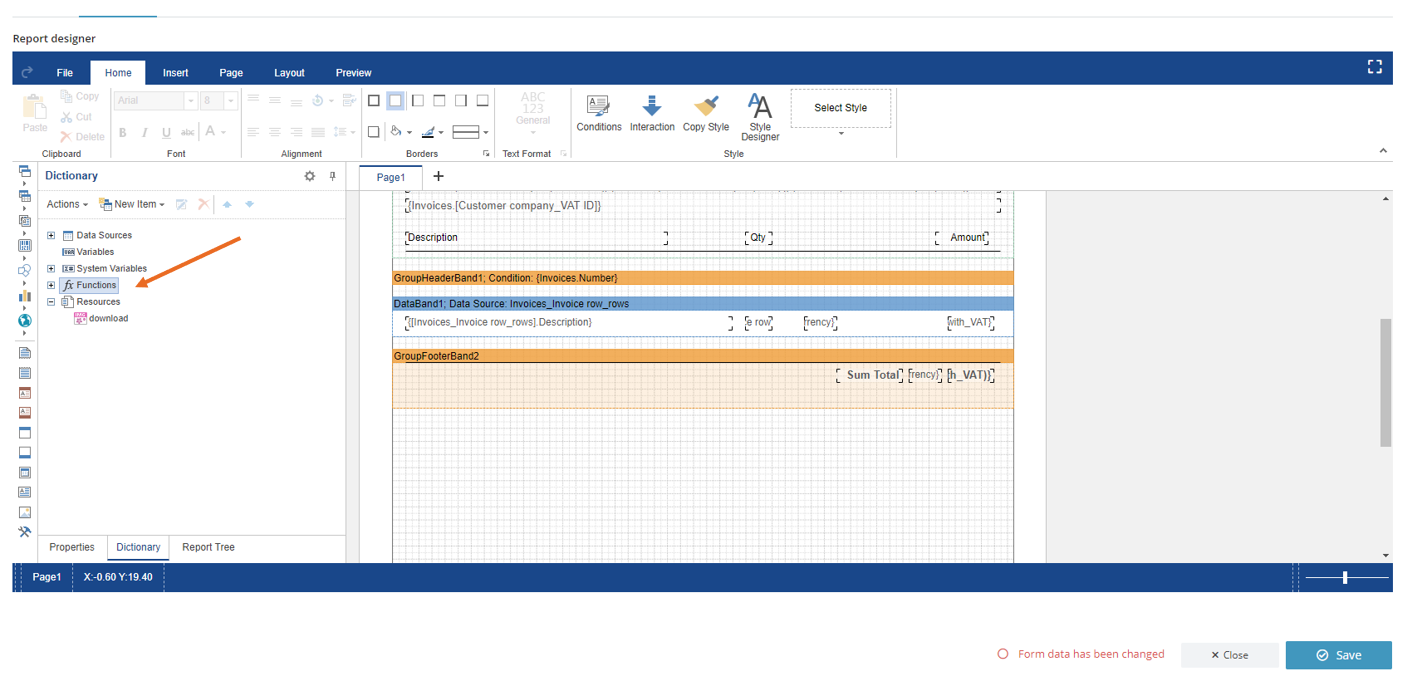
- Add the summary of the invoice by clicking on the "Functions" in the left panel
- From the Functions select Totals - fx Sum - fx Sum (object): decimal
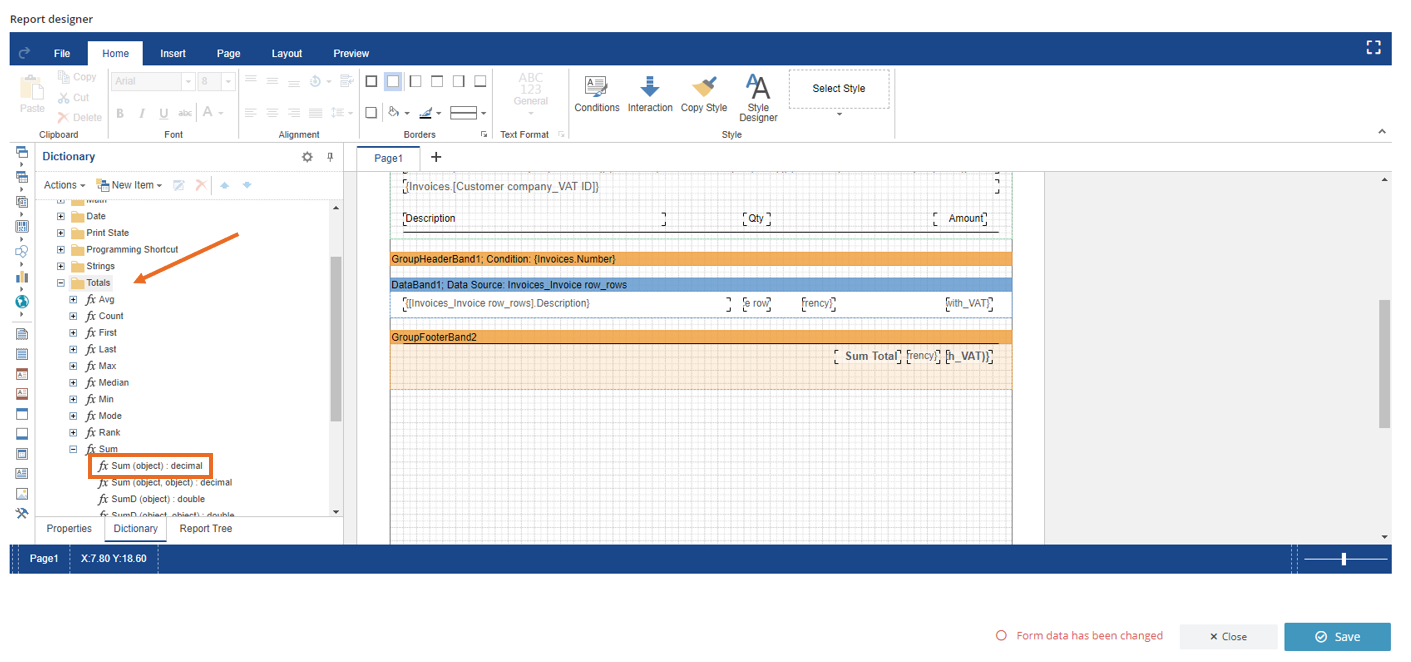
- From the Data Column select the field for the sum calculation
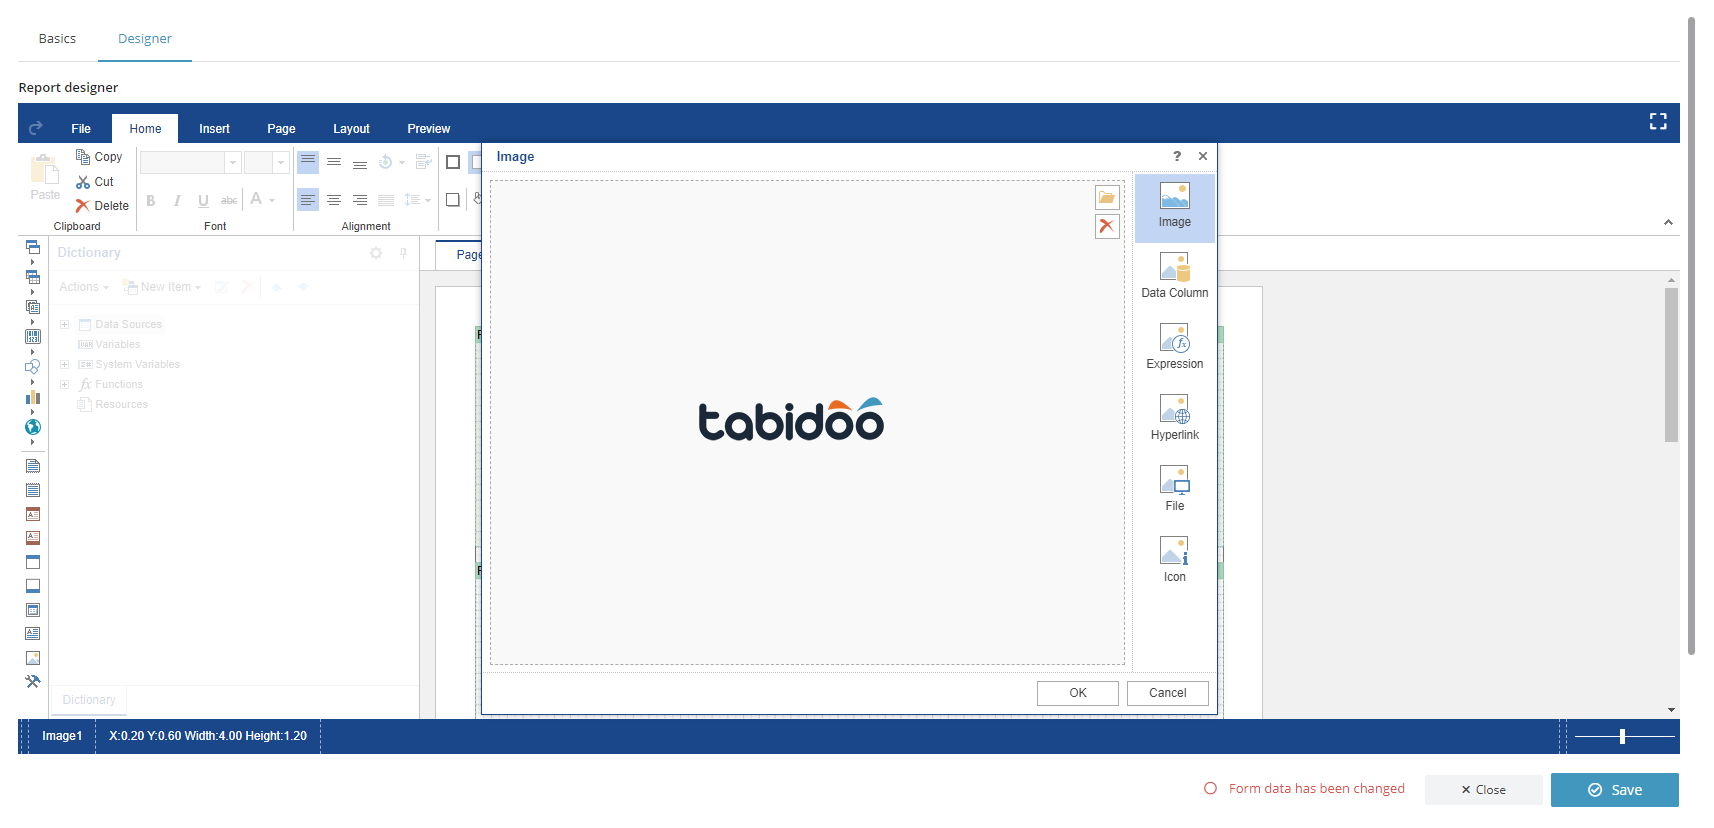
Insert your company logo
- Open the Insert tab
- Select the Image from the Components
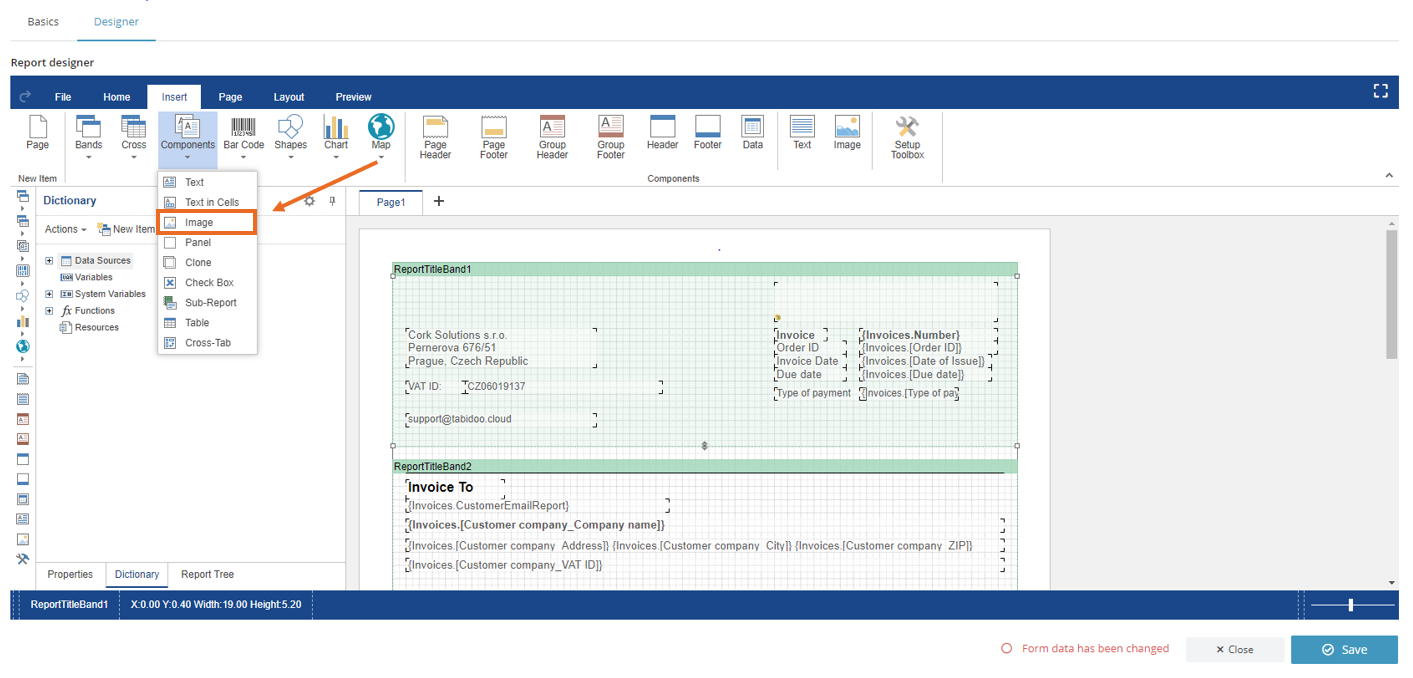
- Drop your company logo or insert a hyperlink.
Good job! Your invoice is ready :)