Advanced Features In Table Fields
If you feel already enough confident about the basics of Tabidoo, it's time for you to become familiar with the advanced features which you can set up in Tabidoo.
In this chapter we will focus on the advanced features in Table Fields:
Where to find Advanced features in Tabidoo
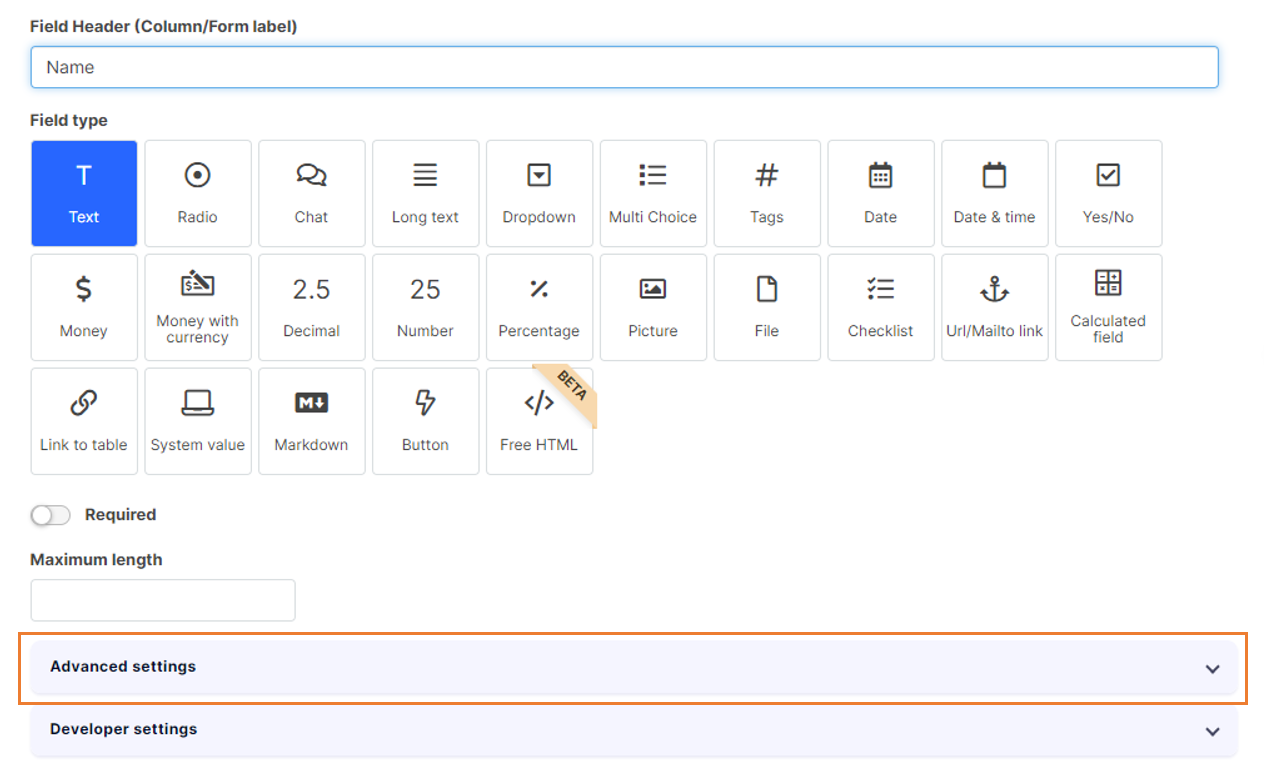
You can find the advanced features under the Field type in the Table fields settings. Once you click on the Advanced features, you realize that it offers many possibilities in Tabidoo. These options differ depending on the field type.
When you select field type Text, these options appear:
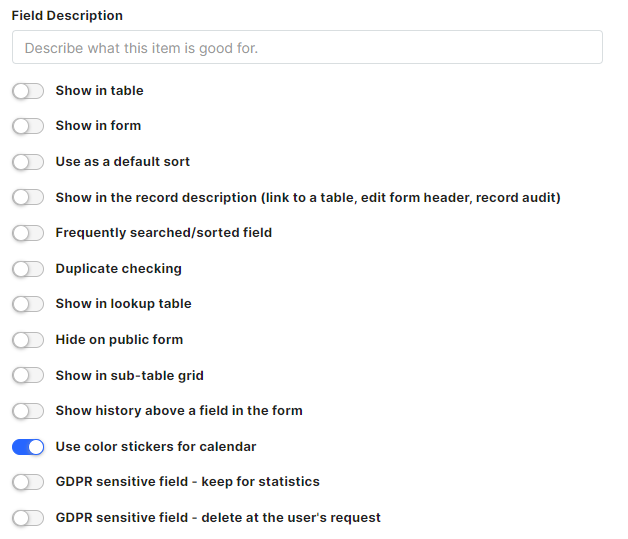
What can you set up in Advanced features in Tabidoo
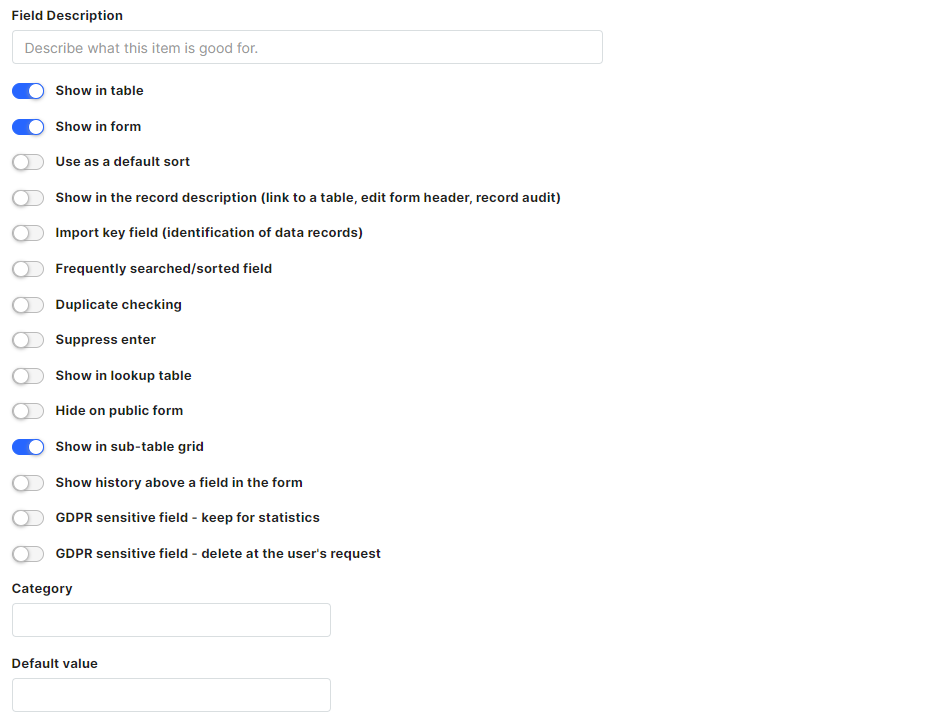
Field Description
You can use this feature if you want to inform the user, what is this item good for, or you can use it as a guide to accurately enter data into the field.
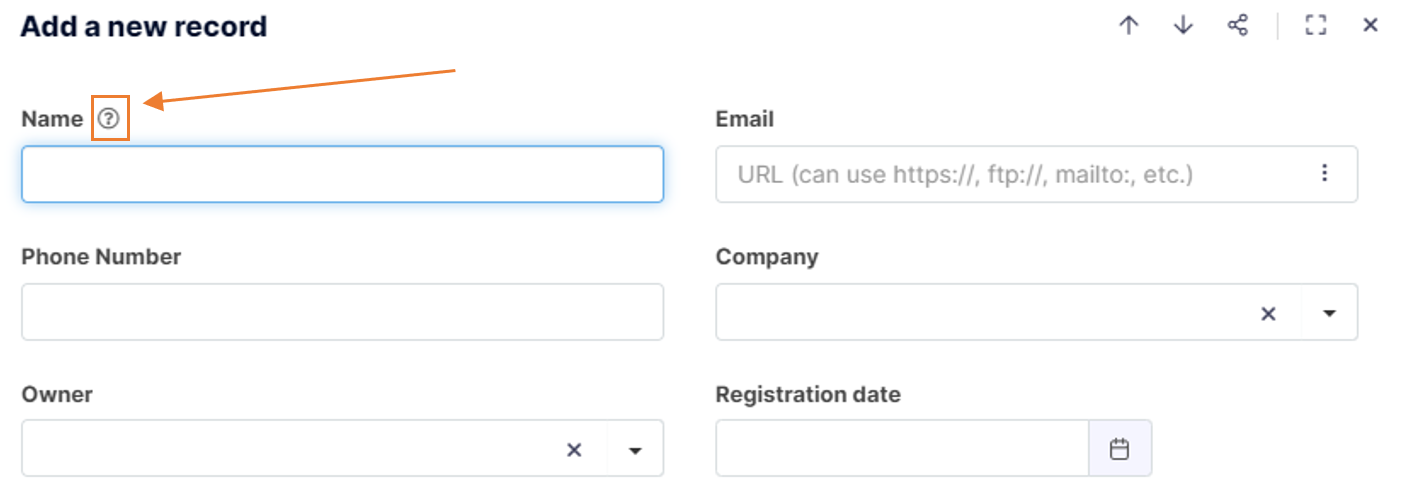
Field description in edit form
Afterwards, when you open the edit form in Tabidoo, you can see next to the field header a question mark. In order to see the field description simply point to the question mark.
Show in grid
If you want this field to appear in the Table, select this option. This option is automatically preset once you add a new field.
Feature to Show in grid
Show in edit form
If you want to display this field in the edit form, select this option. This option is automatically preset once you add a new field.
Feature to Show in edit form
If a field is used in a script for conditional display, it must be set as visible in the form (Show in edit form = true). If this option is disabled, the script will not be able to interact with the field and will terminate without any error message.
Use as a default sort
If you want all the records in your table to be sorted by this field, then select this option. In case you set up as a default sort any text, it will be sorted alphabetically. Moreover, you can also select if data will be sorted as ascending or descending.
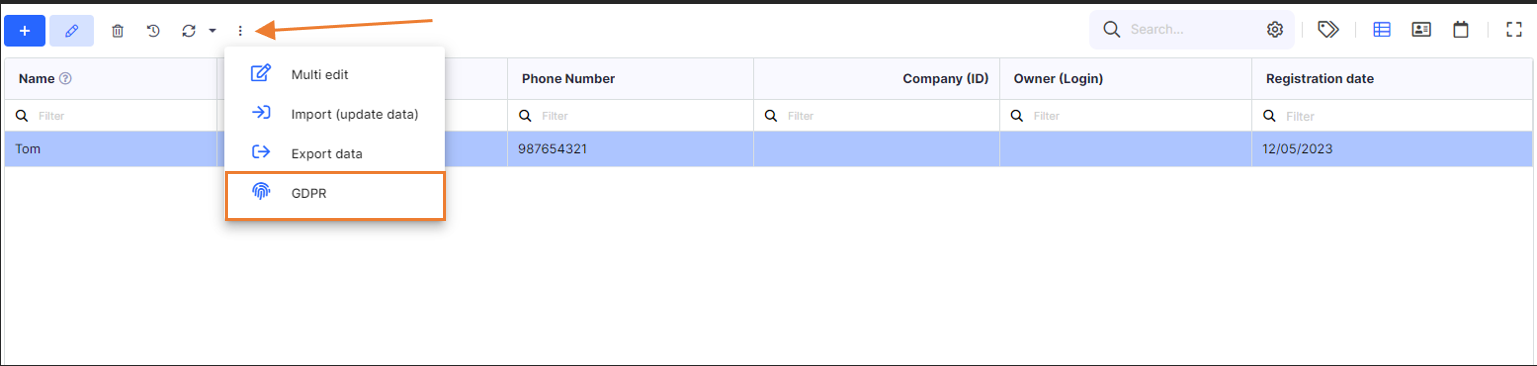
GDPR sensitive - print
If you keep in Tabidoo any sensitive data, this feature helps you to keep them in one place in case you wanted to print them all. You can afterwards put these data in your report and print them when necessary.
GDPR sensitive - delete
This feature is also determined for your sensitive data in Tabidoo. This option helps you to keep them in one place and delete the data whenever needed.
However, for these two options, it is firstly essential to define your table as "GDPR root" see more in the chapter GDPR.
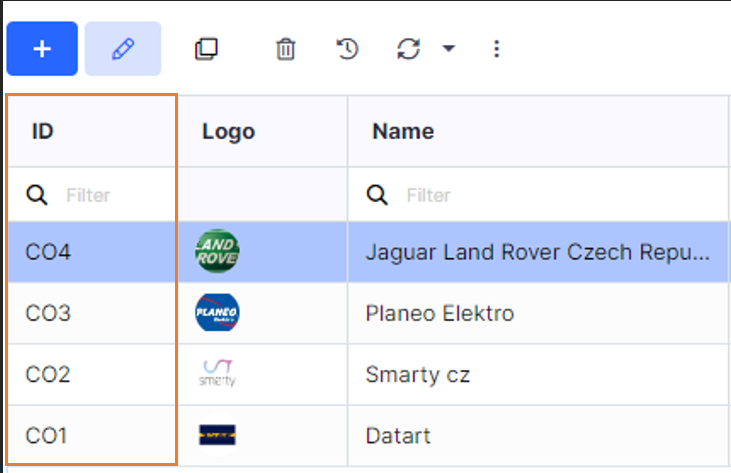
To see all the sensitive data you keep in our table, select this option from the main menu:
GDPR in Tabidoo
Show in the record description (link to a table, edit form header, record audit)
This setting defines which field will be used as the main record label across the application.
It ensures that user-friendly values are displayed instead of technical identifiers (such as record IDs).
This affects several areas:
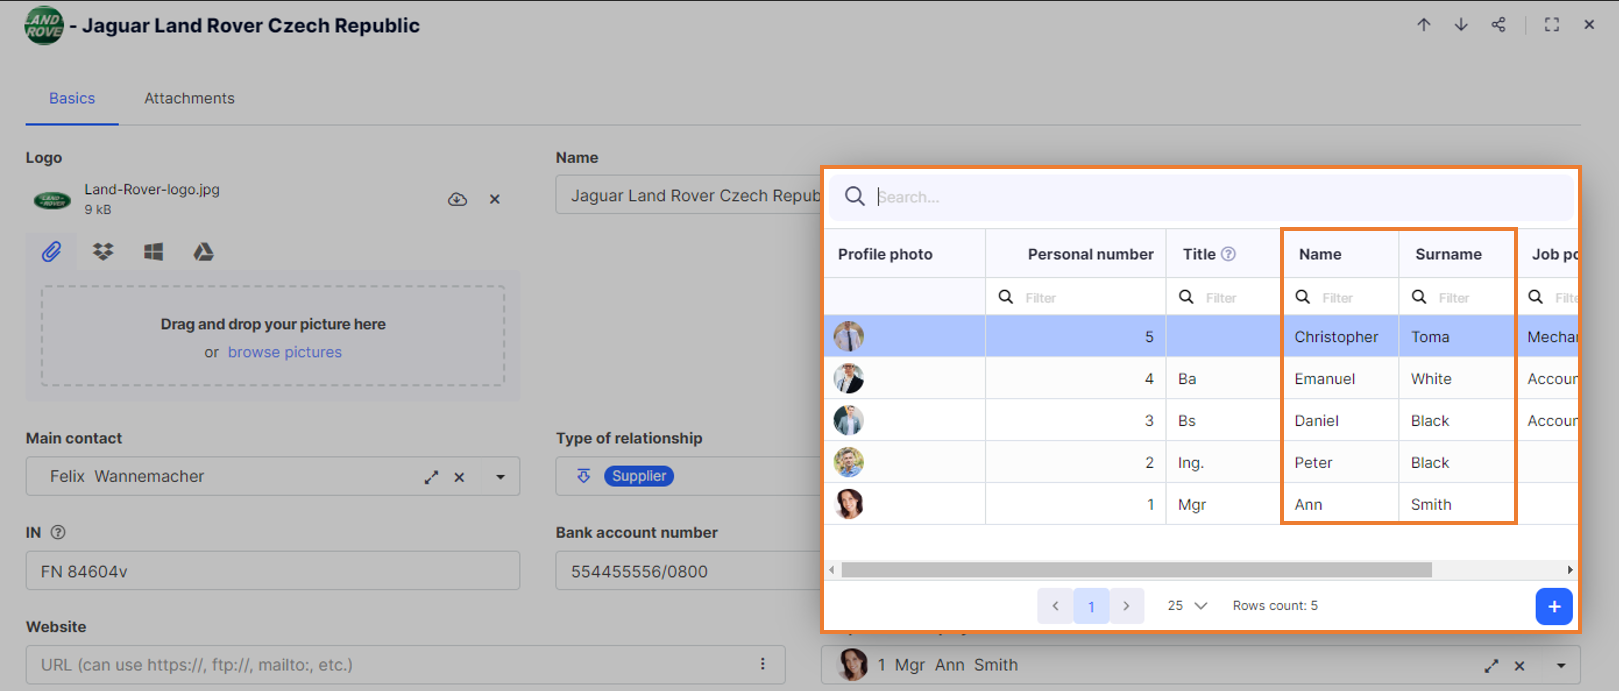
1) Linked records (table relations)
When linking data between tables, this field is used as the displayed value of the related record.
- Example:
Company = Tabidoo(clear and readable)- instead of
Company = 123(ID, not user-friendly)
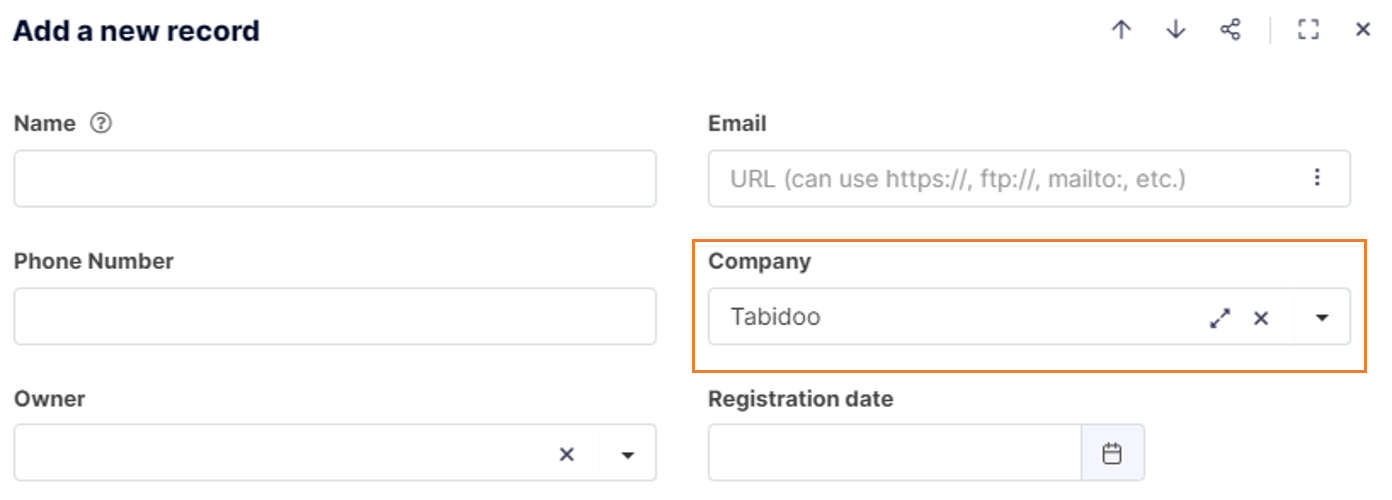
Feature to Show field in the table description
2) Edit form header
This field is used as the title of the record in the edit form.
- Example:
Name = Tom→ the record will be displayed with the header Tom
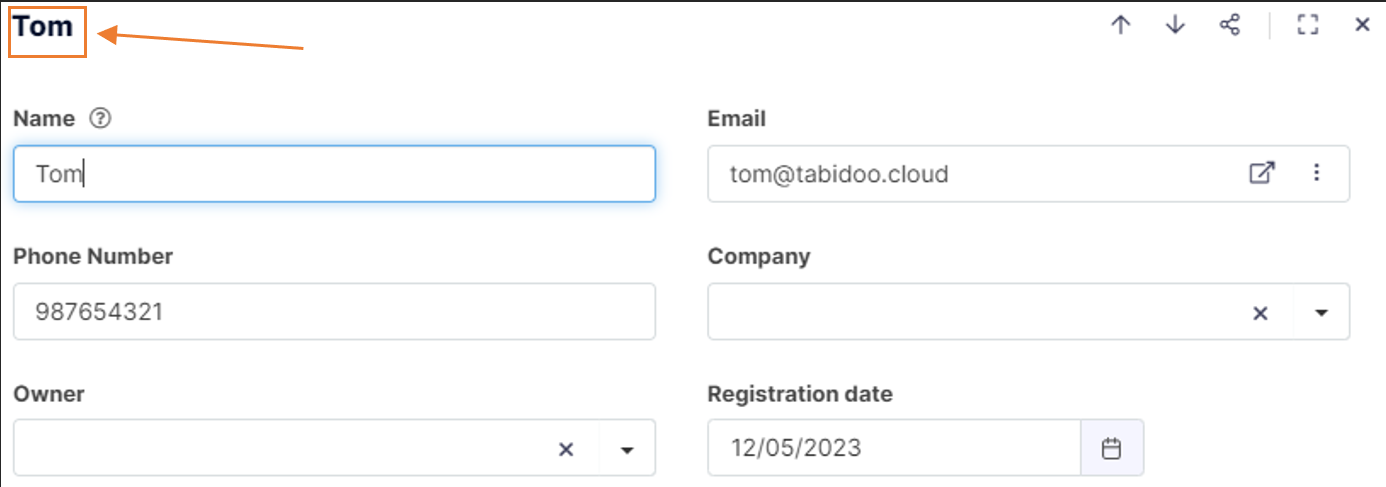
Feature to Show field as the edit form header
3) Record audit (change history)
This field is used to identify the record in the audit log.
- It makes it clear which specific record the change refers to, instead of showing only an ID.

Object description in the record audit
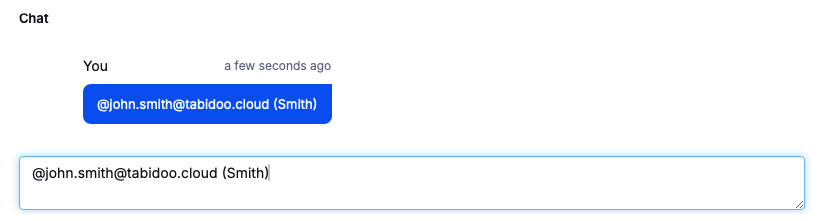
4) Chat and notifications
This field is also used when notifying users (e.g. in chat mentions or notifications).
- It helps users quickly identify the related record or person.
- Example:
@john.smith@tabidoo.cloud (Smith)→ clearer identification thanks to the selected field
Import key field
Import key field serves as the data identifier when you import data from Excel to Tabidoo. It identifies the data in order that there will not be any duplicates and the already existing data in your table will be updated by the Excel file. When you make a new table, the first field of the table is automatically preset as the import key field.
Frequently searched column (can increase search speed)
If you search and filter your data often in any of your columns in the table, this feature helps you to speed it up. However, be careful it enlarges databases that your table includes. Therefore, it is important to set it up only for the fields where it is really necessary.
Values in this column must be unique
In order to avoid any duplicates in the column, select this option.
Duplicate checking
To check that one value is not in the table twice.
Suppress enter
The standard behaviour of forms is that Enter saves the data in the text field and closes the form. Therefore, if the user uses input from, for example, a barcode reader, these normally send Enter at the end of the input. This of course closes the form. The new option allows this Enter to be suppressed on the Tabidoo side, if the user cannot turn it off on the barcode reader side.
Show in lookup
Once you link data between tables, this feature can help you to set up which fields should display in the lookup of the link to table field. This can only be set in the field settings of the linked table.
Feature Show in a lookup
Hide on public form
It is possible to make your form public in Tabidoo and share the link with anyone. By selecting this option you simply hide the selected field from the public form.
Show in sub-table grid
If you link two tables in Tabidoo and use the One to Many binding type, selecting this function ensures that this field appears in the grid of the linked sub-table.
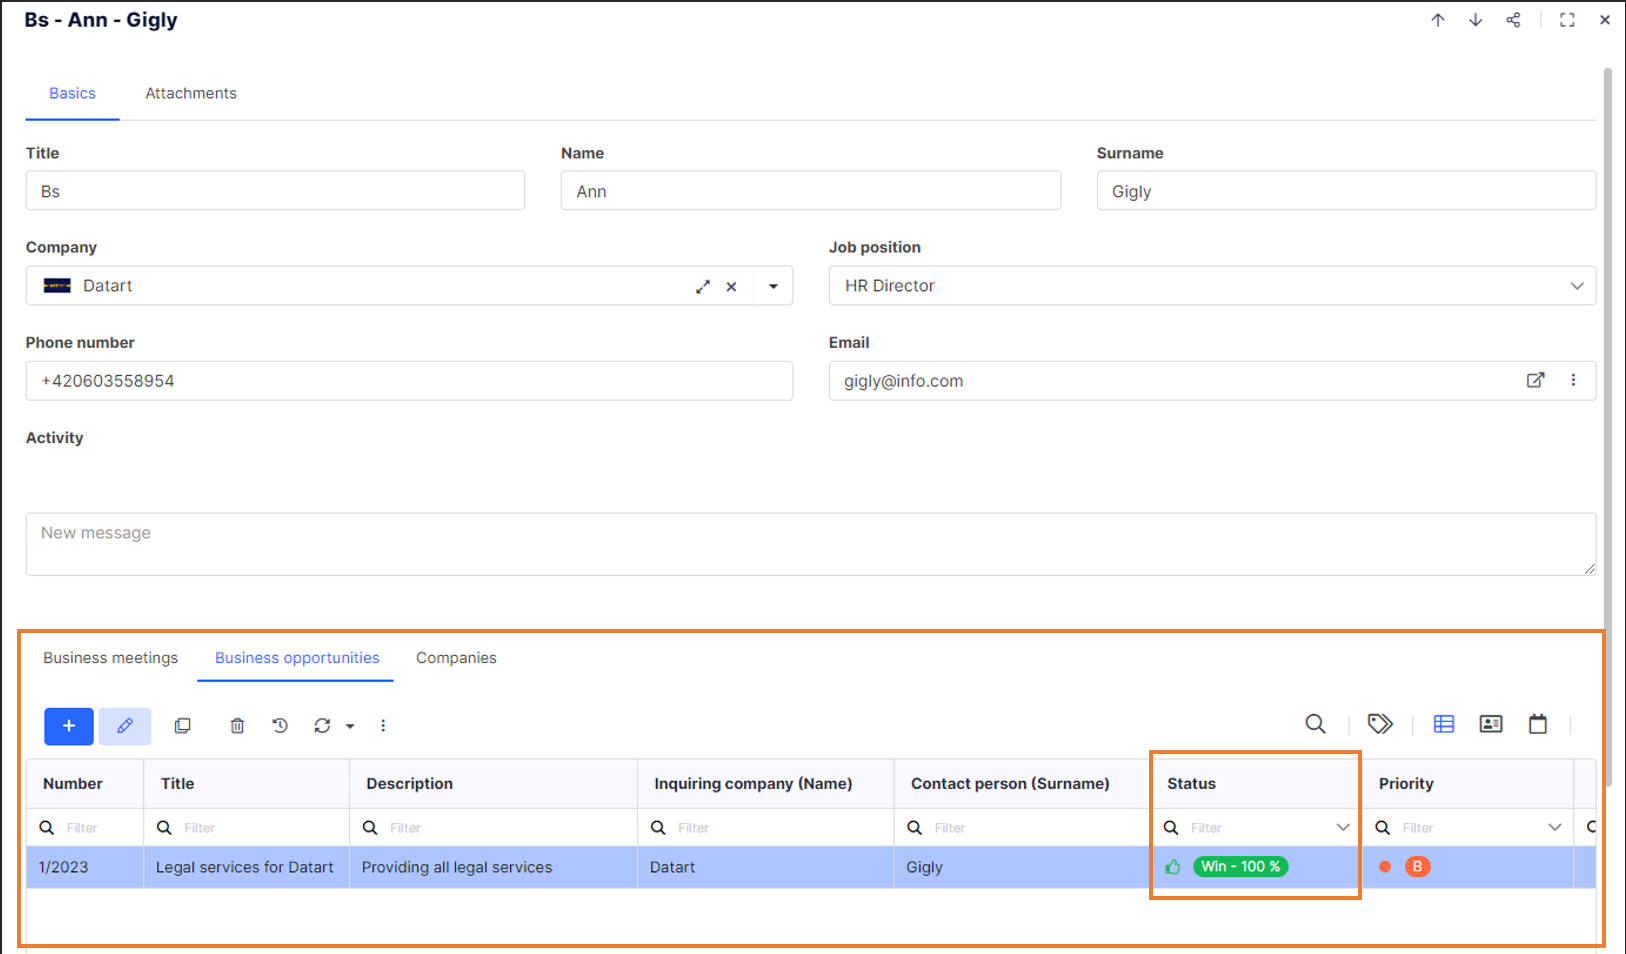
Feature to Show in sub-table grid
Show history above a field in the form
When you open the table, a "clock" will appear above a particular field where you can view the history if any changes have been made.
Category
Entering Category separates the selected field from the other fields on the edit form. To split multiple fields under the same category, simply copy the category name into the "Category" field of the selected fields.
Divided fields into categories
Default value
The default value is useful if you want to make things easier for users and automatically pre-fill some values in edit form fields. It can also be used when you want certain values to be filled in a certain way. For example - phone number with area code.
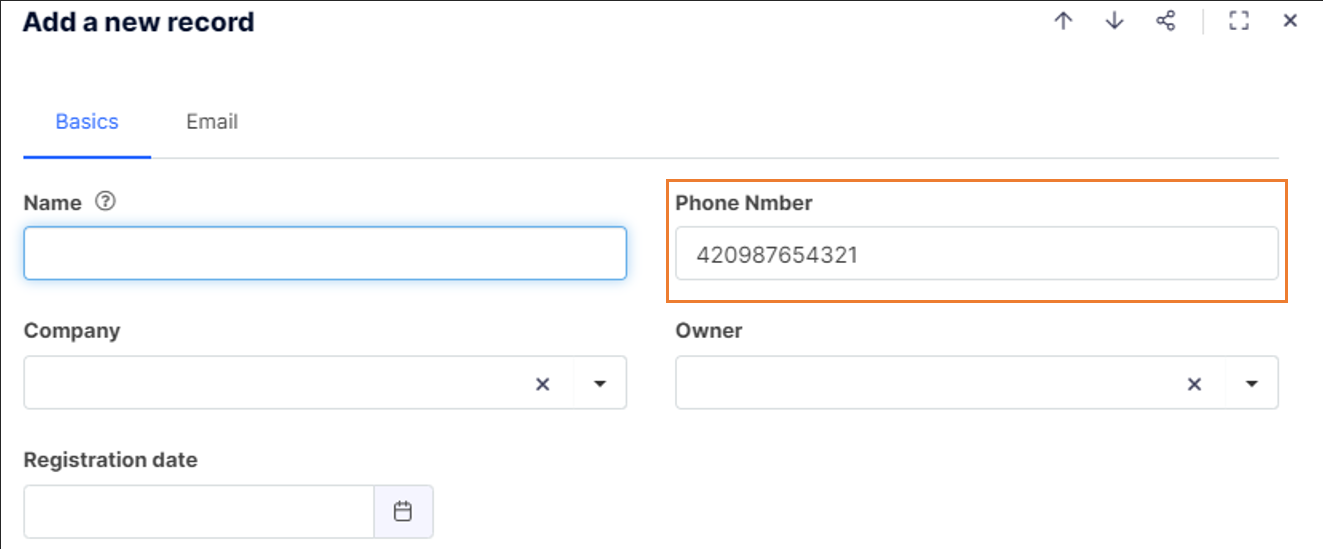
The default value in Tabidoo
Extra feature for - Radio, Dropdown, MultiChoice
There is one extra feature for these field types:
Feature to Use color stickers for the calendar
Use color stickers for the calendar
The default color for all the stickers in the calendar is blue. However, if you set specific background color for each dropdown/radio/multi-choice in the settings and select this advanced feature, the color will change accordingly.
Color stickers for the calendar
Extra features for - Date, Date & time
These field types have two additional functions compared to the Text field type:
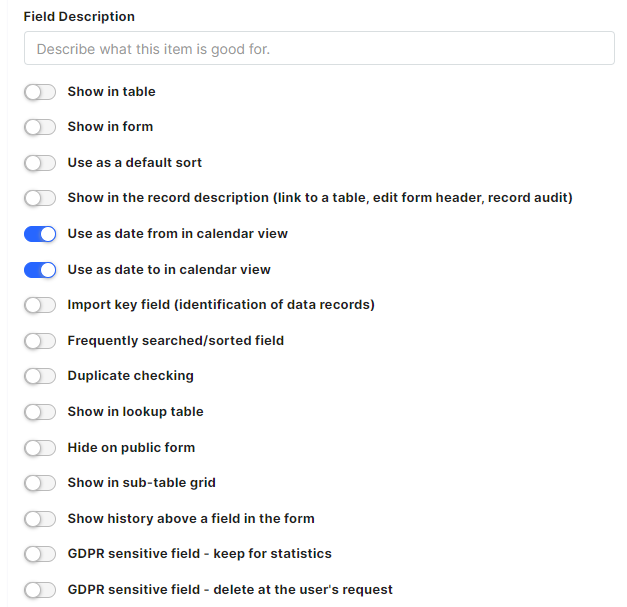
Extra features for the field type Date
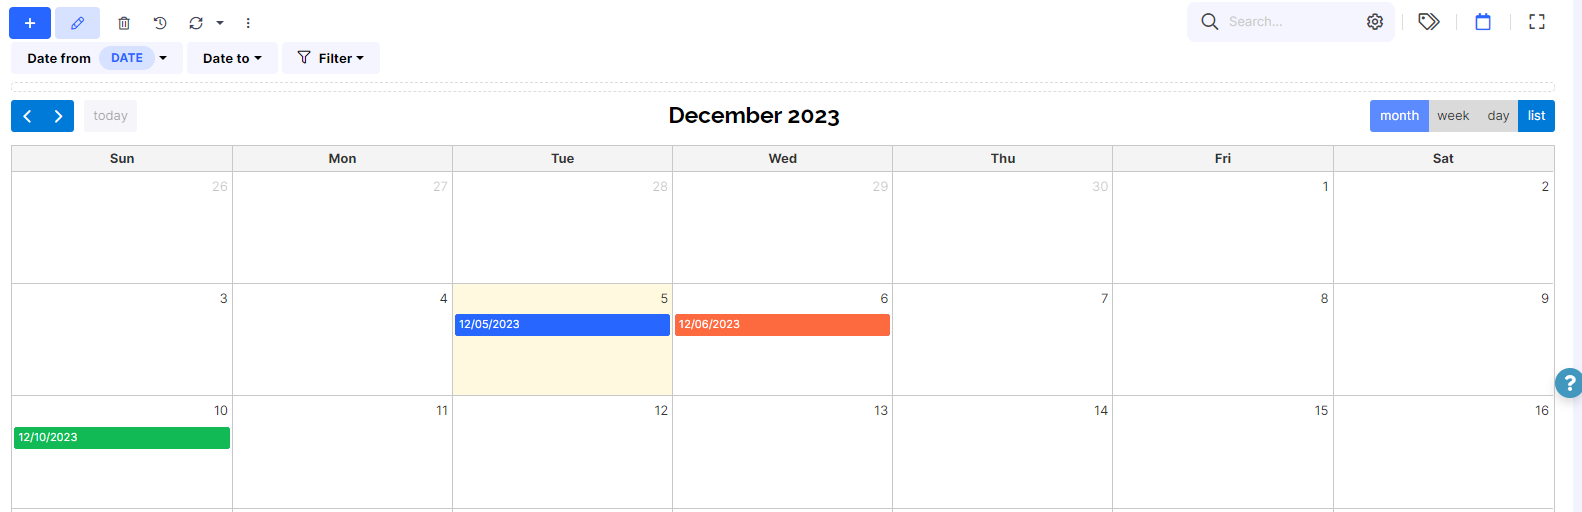
These two options are used when you have two Date fields in your table. You can set them as a date from and date to to specify the duration of, for example, a project.
The following image shows how the dates will subsequently appear in the calendar view in Tabidoo.
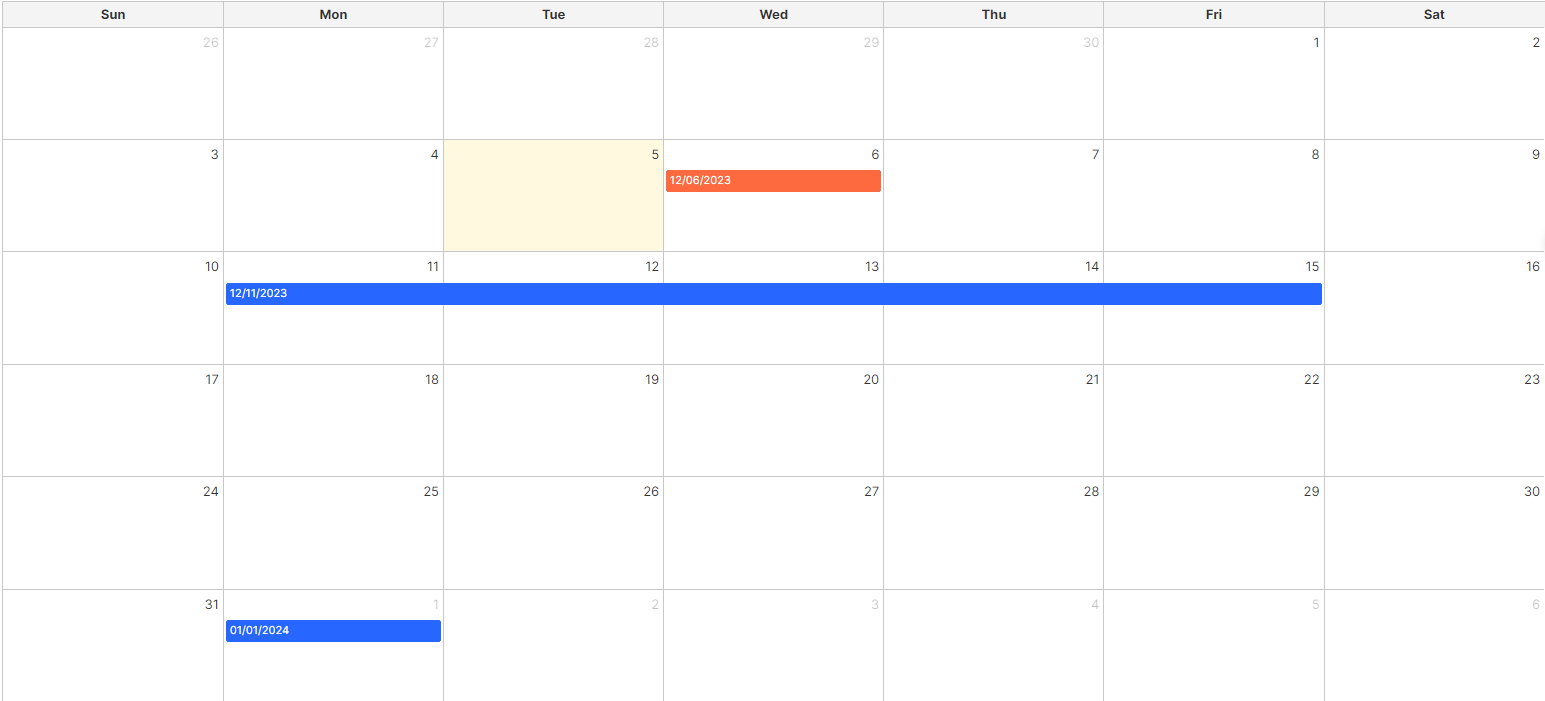
The Calendar view in Tabidoo
Use as a date from in calendar view
By selecting this option, the date field will display in the calendar view as the date from.
Use as a date in the calendar view
By selecting this option, the date field will display in the calendar view as the date to.
Extra features for - Money with currency
The field type has a special window settings that appears when you click on Currencies setup.
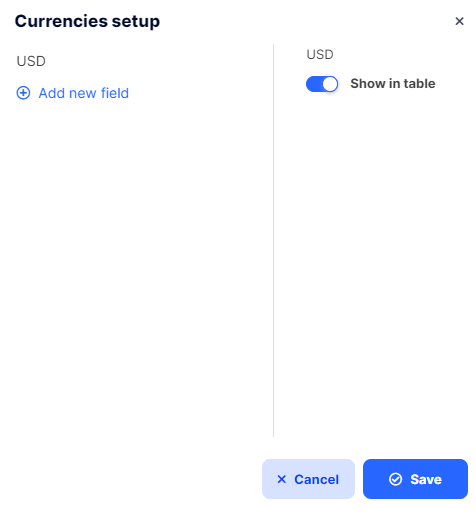
Extra features for the field type Money with currency.
You can add currencies and choose whether you want Show in table. When you check Show in table, the Show in sub-table grid option is automatically checked.
Field type - Number
There is an extra feature compared to field type Text:
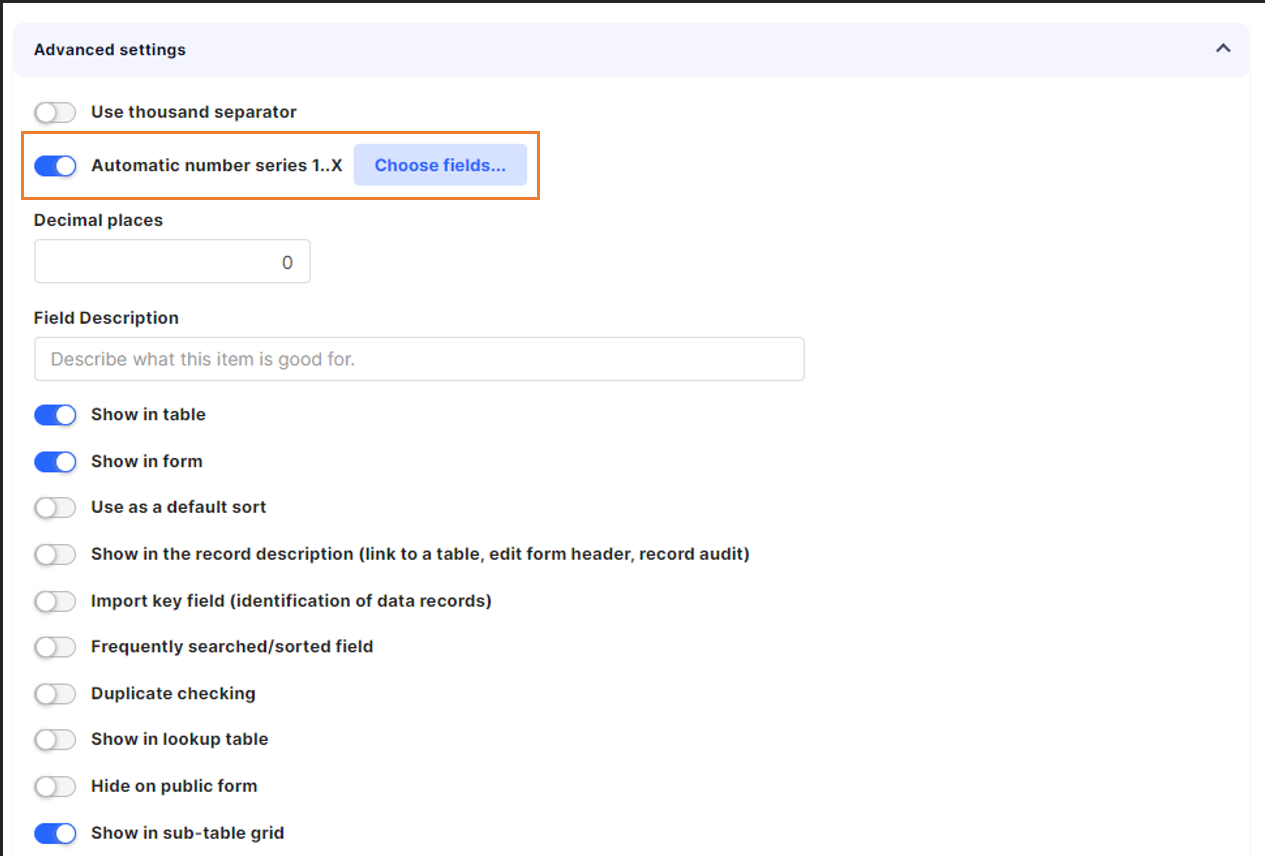
Automatic identifier 1...X
This feature automatically determines the order in which records were added to the table and numbers them from 1 to x.
The option "Choose columns" provides you to group the records and number them depending on the selected field.
For example, if you select the date field, it can number each new month's records from 1 to x. If you select a text field (e.g. Name), it can number the records from 1 to x that are associated with a particular name.
You can select any number of fields and group records by them.
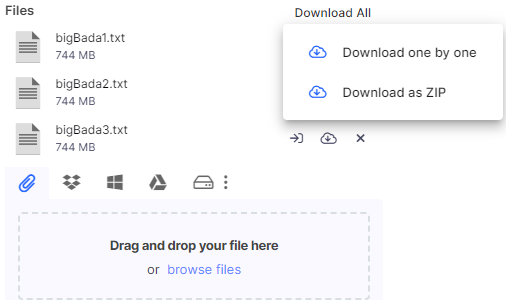
Download files
In the case of "Allow multiple files", you can download all files at once, but only from local repositories.
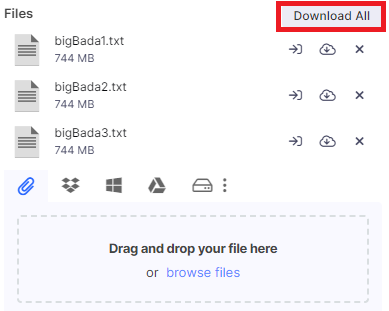
For small files, you can select the "Download one by one" option. For large files, choose "Download as ZIP".