
How to Import data from Excel
Tabidoo supports the import of the following formats:
- XLSX
- XLS
How to Import data from Excel
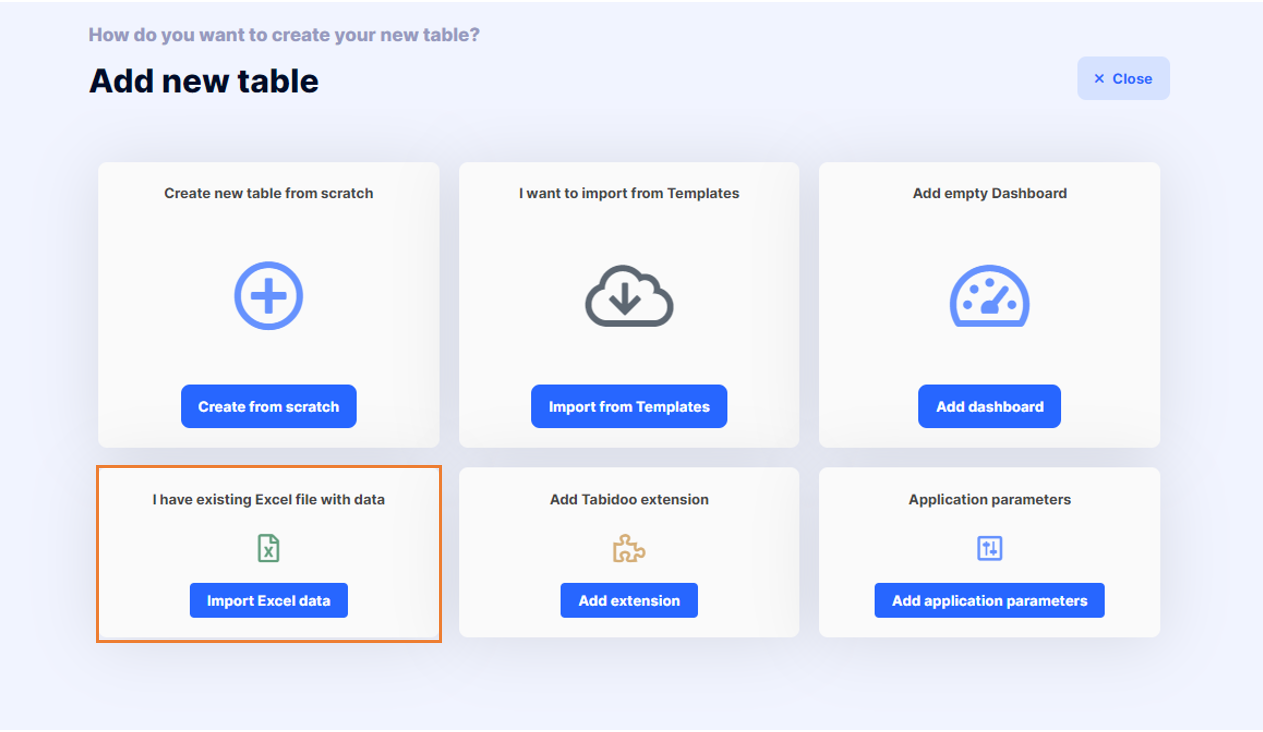
If you want to create a completely new table in Tabidoo by importing from an Excel file, just follow this step:
- From the options "Add a new table" select - Import Excel data.
How to import data from the Excel file to Tabidoo
If you have more than one sheet in your Excel file, all sheets will be imported into Tabidoo as separate tables. This means that if you have two sheets in Excel called, for example, "Customers" and "Orders". They will be imported into Tabidoo as two tables with the same names.
How to update data in Tabidoo by Excel
If you only want to update existing data in Tabidoo by importing from Excel, you need to do the following:
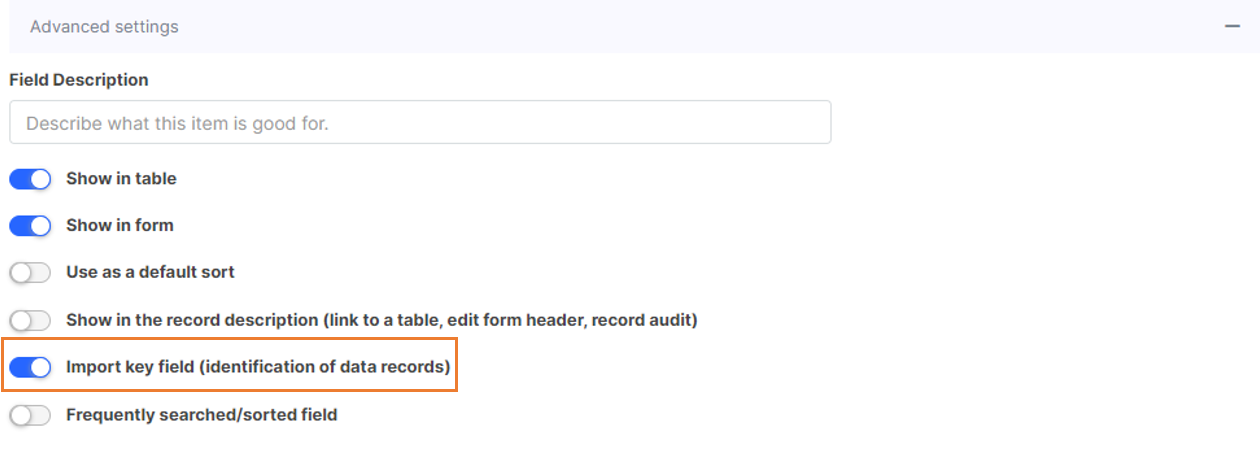
- First, it is necessary to specify the import key column in the table definition so that the system can identify the records accurately. You can set it in the settings of the specific field, in the advanced features select the option - Import key field.
The import key column must not contain any duplicates. Otherwise, an error will occur when importing data.
The first field in the table is automatically preset as the import key field for the user.
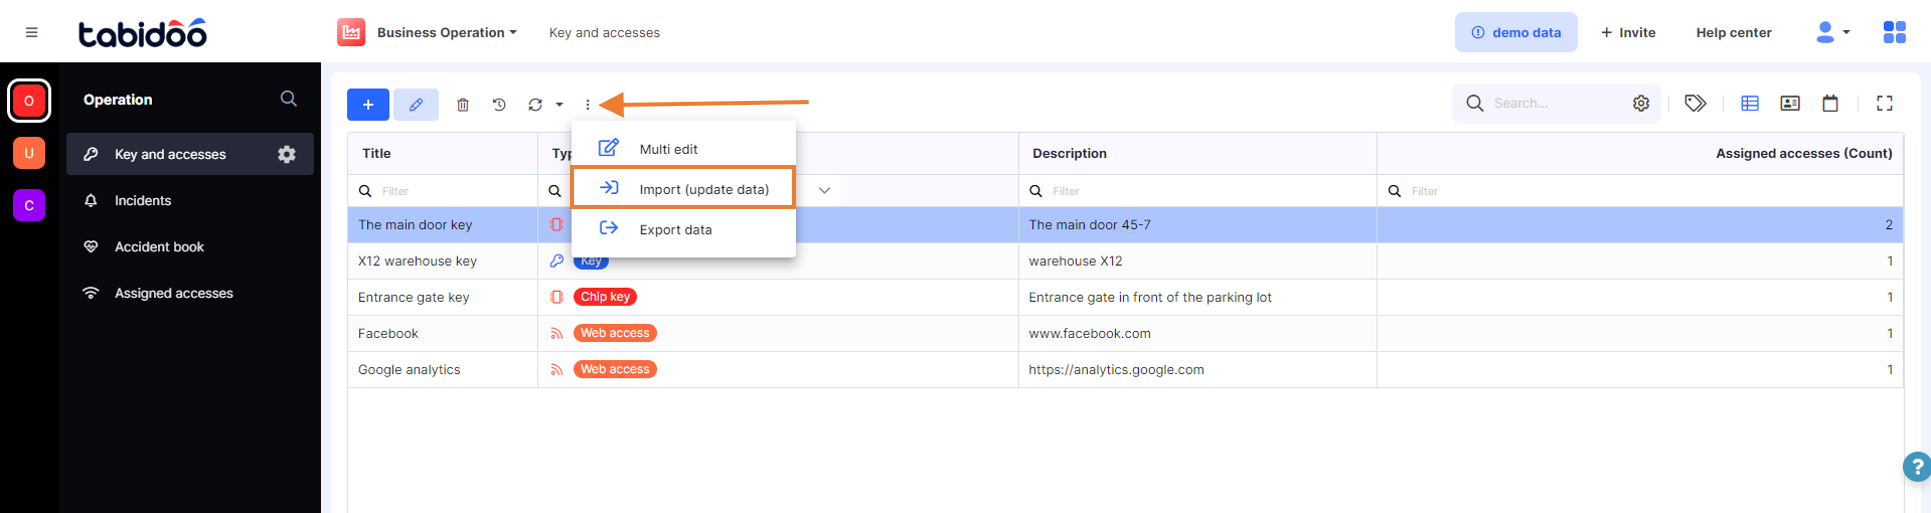
- In the selected table, click to Expand the menu and then click on Import (update data) from the options in Dropdown.
Afterward, these options will appear:

- Add records existing in import but not in the table - this option avoids the risk of duplication of your records.Only records that do not exist in your Tabidoo table will be imported. The data will be imported according to the value of the key column.
- Update records existing in the table and in the import - this option only updates the records in Tabidoo according to the excel sheet. Only changes in rows by key column will be imported.
- Append all imported data without checking the key column - this option imports all data that is in the Excel file without checking the key column. You therefore expose yourself to the risk of potential duplication of your data.
Keep in mind:
- The first sheet of the Excel file containing the data is used to update the current table. The other sheets will be ignored.
- The first row in the worksheet is considered the column header.
- The worksheet must contain at least one row of data (except column headers).
- By import you can only update or add new records, you can not delete anything.
- Column headers in the Excel sheet must match the column headers in the table in Tabidoo.
- If there is an error in the records during import - all other records are imported and those with errors are skipped.
How to import only some columns from Excel?
To import only some selected columns from an Excel sheet, you simply need to delete all the columns in the Excel sheet that you do not want to import, leaving only the selected columns + the Import Key column.
How long does it take?
Depends on the size of the Excel file - the number of columns and rows in the Excel and the complexity of the data (number of links, numerical series, calculated fields). The import can take from a few seconds to minutes.
However, if the import takes longer, it will be automatically processed in the background while you can get back to work and use Tabidoo freely.
Some data are calculated asynchronously (e.g. links, number series, calculated fields), which means that they will be automatically added to the data after import. Therefore, do not worry if they are empty immediately after import.
How to import linked records (N:M)
It is also possible to import from Excel sheet column data into ‘Link to table’ field type.
To import such data, you first have to make sure the data you will be importing are displayed in the grid. Eg. in the example below in a table Tasks, a task can be assigned to multiple users.

To see the list of the names of assigned users and enable import of the linked data set up the settings of the column Assigned To in the following way:
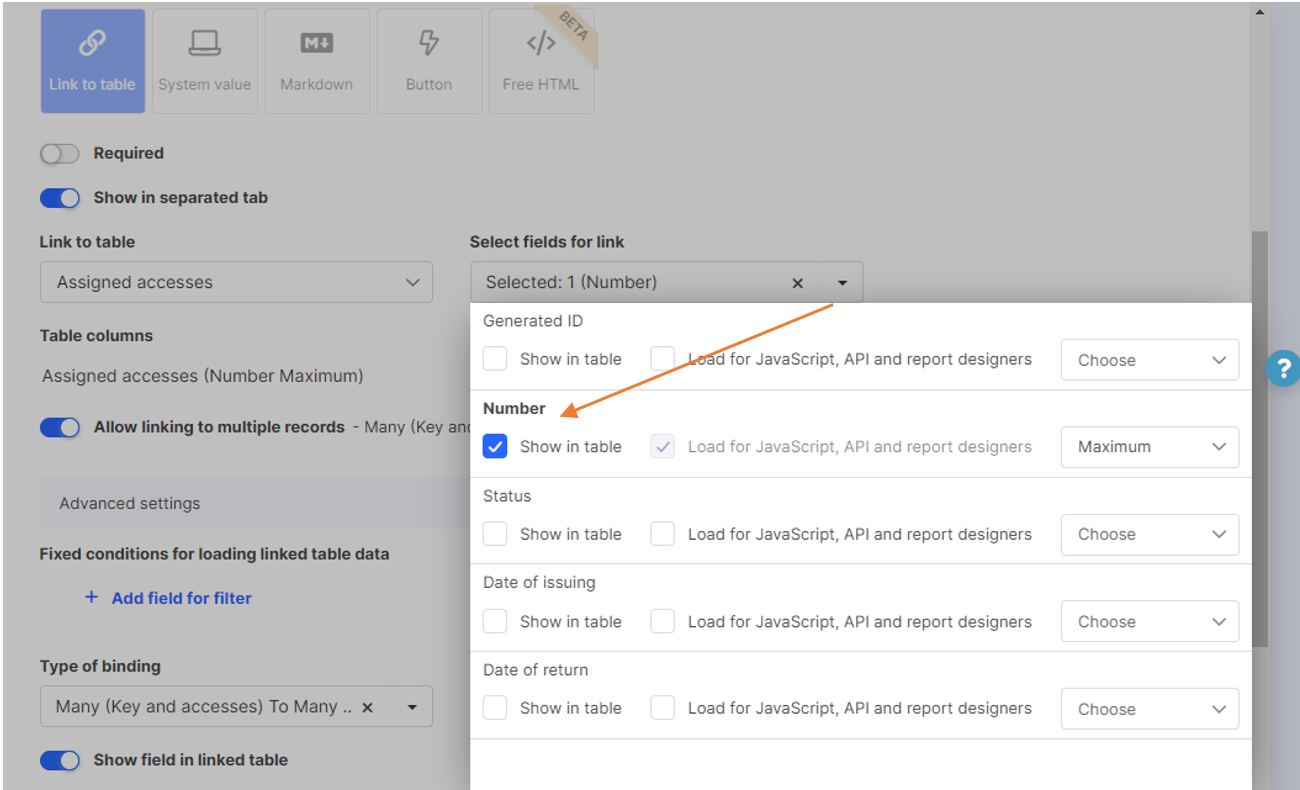
In the field Select fields for link, select the column you want to display in the grid, in this case Name. In the dropdown menu select List to display values of all the linked records - in this case all the names of the users assigned to the task.
When you then import data into the column Assigned To, you have to make sure that the name of the column in the Excel sheet is named exactly the same as it appears in the grid.

When importing multiple values, they have to be separated by the vertical line => |.
If you are not sure about anything, you can always export data from a table first and use the Excel sheet as a template to import additional data.