
doo.form
The usage is pretty wide. You can prefill records in a table based on the currently selected records. Even records from another table.
You can use one of the functions in the doo.form namespace to manipulate with form object:
Functions
async openForm(tableNameOrId, options?)
It opens an input form for the table (use table name or id).
options and applicationId are optional
Note:
When a form is opened using `doo.form.openForm`, the form’s **onInitScript** is executed automatically, just like when the form is opened manually by the user.
This allows you to combine programmatic form opening with form-level initialization logic (e.g. prefilling values, field visibility, conditional behavior).
See more details and examples in the article: Using openForm together with onInitScript
saveAndStay
Save the current form and leave it open. Beta functionality. The function can be moved or renamed! It is an asynchronous function and must be called using await
// when changes are made to Order Items, save the form and keep it open
if (doo.model.orderItems.currentlyChanged) {
    await doo.form.saveAndStay();
}
updateCalculatedFields
Reload data in form. Tries to recalculate the server calculations and fill them back to the form. Beta functionality. It is not guarateed to work!
// refresh calculated fields after changing quantity or price
if (doo.model.quantity.currentlyChanged || doo.model.price.currentlyChanged) {
    await doo.form.updateCalculatedFields();
}
async saveAndClose
Saves the current form and closes it. Beta functionality. The function may be moved or renamed in the future. This is an asynchronous function and should be called using await
// when a follow-up activity is created, save the current activity and close the form
if (doo.model.followUpActivity?.value) {
    await doo.form.saveAndClose();
}
Example #1 - options parameter - define and use
const options: IOpenFormOptions = {};
...
await doo.form.openForm(tableName, options);
In parameter options you can fill several properties:
- model to prefill the form.
Example #2 - options.model parameter - opens a new form
options.model = {
         name: 'Peter',
         position: doo.model.preposition.value
     }
Example #3 - options.model parameter - opens an edit form - use id in model
options.model: {
     	 id: doo.model.customer.value.id,
         position: doo.model.preposition.value
     }
- header - form title
Note
When using fields of type "Link to table" (e.g., position, location, etc.), make sure to wrap the value in an object when editing a record.
Use the format:
{ id: doo.model.linkedField.value?.id }
While the unwrapped value (e.g., position: doo.model.position.value) may work when creating a new record, it may not behave correctly when editing – the form expects a wrapped object to properly recognize the linked entity.
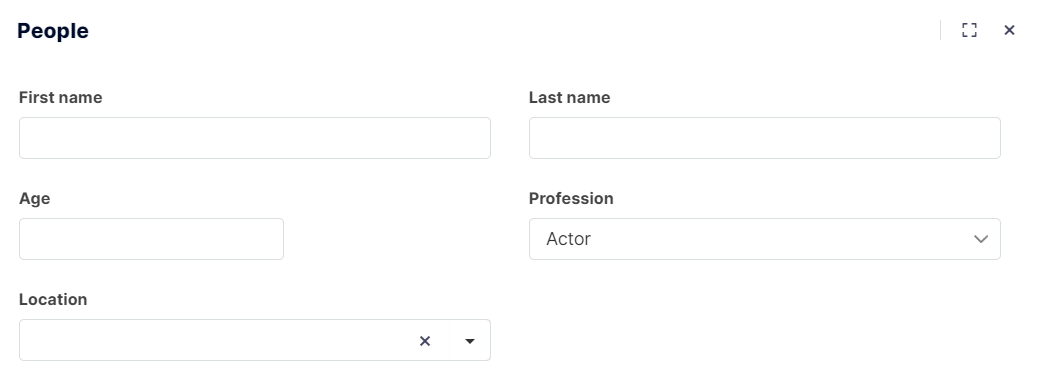
Example #4 - options.header parameter
options.header = 'People';- fields to define own form, it's a list of form fields where you can define (in this case you do not need to specify the tableNameOrId parameter, just write null)
- name - internal name of field
- header - form label, optional parameter (form generate header from name)
- dataType - type of field (Text, Radio, DropDown, Date ...)
- order - position on form
- items - values for Radio, DropDown and Multichoice field
- defaultValue - prefill field on form
- checkboxDynamicListDefaultValues - predefined values of Checklist field
- required - field must be fill
- linkedTableNameOrId - name or id linked table
- tableLinkType - type of link binding (One To One, Many To One)
- wholeWidth - field is over whole form
Example #5 - options.fields parameter - defines this new form
    options.fields = <IField[]>[
        {
            name: 'firstName',
            header: 'First name',
            order: 10
        },
        {
            name: 'lastName',
            header: 'Last name',
            order: 20
        },
        {
            name: 'age',
            dataType: SchemaColumnDataType.Int,
            order: 30
        },
        {
            name: 'profession',
            dataType: SchemaColumnDataType.Dropdown,
            order: 40,
            items: [
                { value: "Actor", order: 10 },
                { value: "Director", order: 20 },
                { value: "Producent", order: 30 }
            ],
            defaultValue: "Actor"
        },
        {
            name: 'location',
            dataType: SchemaColumnDataType.Link,
            linkedSchemaNameOrId: 'location',
            schemaLinkType: DataSchemaLinkTypeEnum.LN21,
            order: 50
        }
    ];
- saveButtonCallback function that is executed when the Save button is clicked and closes the form if it returns true
Example #6 - options.saveButtonCallback parameter - save values this form to table in application
    options.saveButtonCallback = async (params) => {
        let fields = {
            firstName: params.model['firstName'].value,
            lastName: params.model['lastName'].value,
            age: params.model['age'].value,
            profession: params.model['profession'].value,
            location: params.model['location'].value
        };

        await doo.table.createRecord('people', fields);
        return true;
    };
Form Designer
In addition to working with forms programmatically using the doo.form namespace, Tabidoo also allows you to design and structure forms using layout components.
Form layout elements help organize fields and improve form readability. These elements can also be controlled dynamically using scripting.
Layout elements are accessible through the following object:
doo.form.forms.defaultForm.elements
This allows you to control layout components such as Groupboxes, Tabs, or Splitters.
Groupbox
A Groupbox is used to visually group related fields together.
Label
The displayed title of the Groupbox.
Helps clearly describe the grouped content.
Hide label
If enabled, the Groupbox label will not be displayed.
This is useful when grouping fields visually without needing a title.
Background
Allows you to set a background color for the Groupbox.
This helps visually distinguish grouped fields from the rest of the form.
Auto height
Controls vertical space management.
- If there is free space in the form, the Groupbox expands to fill the remaining height.
- If the form is already filled with other components, the Groupbox only takes the height required by its content.
ID
Internal identifier of the Groupbox.
This identifier can be used in scripting to control the element.
Example:
doo.form.forms.defaultForm.elements.groupbox1.isVisible = false;
Tabs
The Tabs component allows you to organize form content into multiple sections.
Tabs
Displays a list of all tabs in the component.
You can:
- reorder tabs using drag and drop
- open tab details to edit labels or settings
- add new tabs using the Add new item option
Auto height
Works the same way as with the Groupbox component.
If free vertical space exists, the Tabs component expands to fill it.
Otherwise, it uses only the height needed for its content.
ID
Internal identifier of the Tabs component.
Example:
doo.form.forms.defaultForm.elements.tabs1.isVisible = false;
Splitter
A Splitter visually separates sections of a form.
Color
Defines the color of the horizontal line separating form sections.
ID
Internal identifier of the Splitter.
Example:
doo.form.forms.defaultForm.elements.splitter1.isVisible = false;
Scripting in forms
Form scripting allows you to dynamically control both fields and layout elements.
Working with fields
Fields are accessible through the doo.model object.
Example:
// Hide a field
doo.model.firstname.isVisible = false;

// Make a field read-only
doo.model.surname.isReadOnly = true;

// Set field value
doo.model.age.value = 25;
Working with layout elements
Layout elements are accessible through:
doo.form.forms.defaultForm.elements
Example:
// Hide a layout element
doo.form.forms.defaultForm.elements.groupbox1.isVisible = false;
This allows you to dynamically control the visibility and behavior of form layout components.