
User Roles - Advanced Settings
Basic Setup
It is necessary to create two roles:
- One that allows editing of the user’s own records
- One that prevents editing of other users’ records
The table must include a field that can identify the user, e.g., a system field called "Created" (Author of the record).
In the Developer level section, select the field Schema item internal name and name the item "Author".
Role: Editing User’s Own Records
Steps:
- Create a new role, e.g., "User - Editing of Records"
- Set the Application Level Permissions as needed
- In the table tab, set access to Write
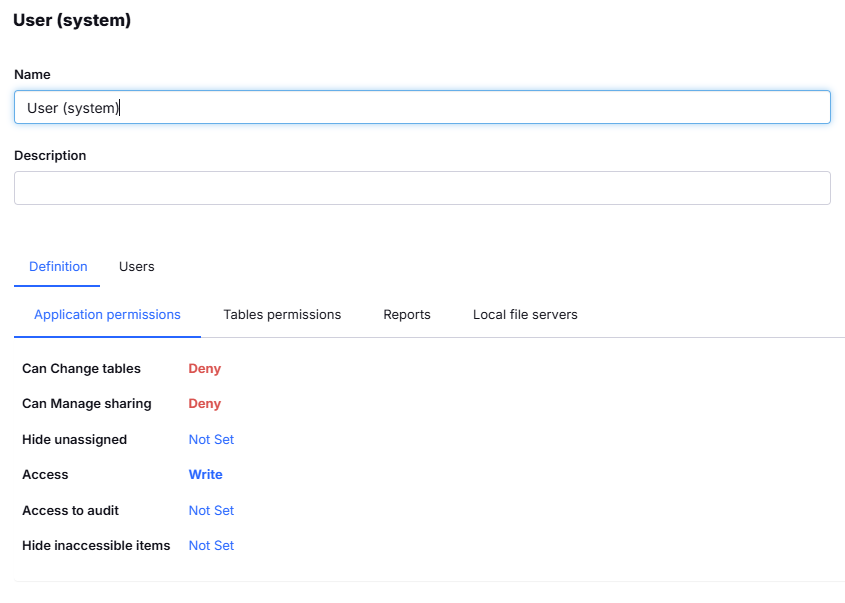
Application permissions
- Add the following condition:
doo.model.Author.value === doo.currentUser.login.value || !doo.model.Author.value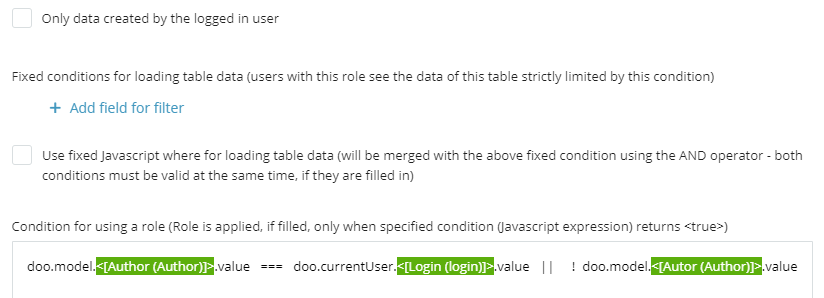
Note on Reports and Role Permissions
When a user creates a new report in the application, the default permission for each role is set to "Not set".
This means that all roles will be able to see the report unless access is explicitly restricted.
If the report should be visible only to a specific role, you need to:
Manually set the report access to Deny for all other roles
or
Restrict access to the table the report is based on
Role: Viewing Other Users’ Records
Steps:
- Create a new role, e.g., "User - Reading of Records"
- Set the Application Level Permissions according to your requirements.
- In the table tab, set access to Read
- Add the following condition:
doo.model.<[Author(Author)]>.value !== doo.currentUser.<[(Login)]>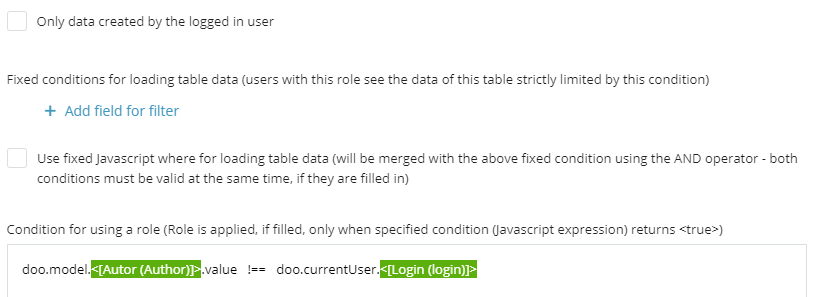
Then assign both roles to users. This allows them to:
- Edit their own records
- View (but not edit) others’ records
Example: Viewing Records Assigned to Me (URL / Mailto link)
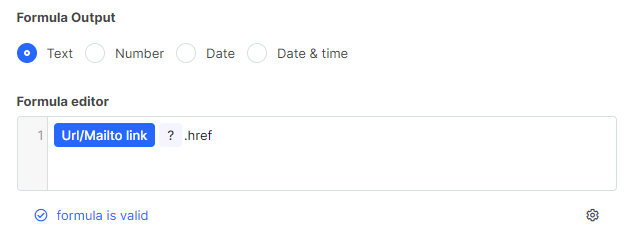
- Create a field of type URL / Mailto Link
- Create a Calculated Field and insert the URL/Mailto field into the formula editor
- Add
?.hrefto the end
- Next, set the condition for the role:
doo.model.<[URL (URL)]> === doo.currentUser.<[Login (login)]>If the field is a link to another table, follow the same logic and display the field in a Calculated Field.
Role Settings for Fields from a Linked Table
I have a table that contains a “Link to table” field pointing to the Users table. I want to set up permissions so that a user can only access records where the assigned user matches the currently logged-in user.
To compare a value from a linked table, you always need to use .value, followed by the specific column you want to compare.
In this case, I am comparing the user ID, so the expression looks like this:
doo.model.<[Users (users)]>.value.x_ID === doo.currentUser.x_ID
This expression means: The ID of the assigned user in the record (retrieved via the linked field to the Users table) must match the ID of the currently logged-in user.
Role condition example in Tabidoo
doo.model.<[Responsible person (assignedTo)]>.login === doo.currentUser.<[Login (login)]> ||
doo.model.<[Creator (creator)]>.value === doo.currentUser.<[Login (login)]> ||
doo.model.<[Watch (watch)]>.login._$$list === doo.currentUser.<[Login (login)]>.value ||
doo.model.<[Assigned department (assignedDepartment)]>.department === doo.currentUser.<[Department (department)]>
Explanation
You're working with fields that are linked to other tables, and you're building a condition to define role-based access. Here's what each part does:
👉 doo.model.<[Responsible person (assignedTo)]>.login === doo.currentUser.<[Login (login)]>
Checks if the responsible person in the record is the currently logged-in user.
👉 doo.model.<[Creator (creator)]>.value === doo.currentUser.<[Login (login)]>
Compares the creator (a system field) of the record to the current user.
👉 doo.model.<[Watch (watch)]>.login._$$list === doo.currentUser.<[Login (login)]>.value
Checks if the current user is listed among watchers (many-to-many relation).
Use ._$$list to fetch all users in a many-to-many link.
Tip: Use ._$$count if you need to compare counts instead.
👉 doo.model.<[Assigned department (assignedDepartment)]>.department === doo.currentUser.<[Department (department)]>
Compares the assigned department in the record to the department of the current user.
Comparing Lists Between Tables (Many-to-Many)
doo.model.<[Vacancy (vacancy)]>.value.user._$$list in doo.currentUser.<[Department (department)]>.value.user._$$list This example compares two many-to-many fields.
Both sides return a list of users (via ._$$list).
The in operator compares the values returned by both expressions.
This is useful for checking overlaps between two related collections.
Important Notes on Role Conditions
Avoid contains – it checks all values in a list and can lead to unintended matches.
Example: filtering by "Ing." would select all engineers, not just one specific person.
Use === for exact matches whenever possible.
Visibility settings work on many-to-many (n:m) fields!
You can safely use ._$$list and in to manage access logic involving linked tables.
Tip:
It’s also possible to use the fixed filter Logged in User in case of a many-to-many relationship, as long as the relation is linked to the Login field.
This allows you to easily limit records based on the currently logged-in user even within n:m relationships.